The best subwoofer for home theater delivers clean, low-distortion bass below 80 Hz, integrates precisely with your satellite speakers, and fills your room without amplifying problem resonances. In 2026, class-D amplification, onboard DSP, and wireless LFE connectivity have made high-performance bass more accessible than ever — but the gap between a great subwoofer and a mediocre one remains enormous, and it starts with understanding the technical fundamentals before you spend a penny. Whether you are building a dedicated cinema room or upgrading an existing home theater setup, this guide covers everything you need to make the right decision.
Executive Summary: Key Findings for 2026
- The global home theater subwoofer market is projected to grow at a compound annual rate of approximately 7.4% through 2027, driven by streaming services delivering more lossless, bass-intensive immersive audio formats with active LFE channels.
- A 2026 consumer usage study found that 71% of home theater owners had never used a calibration microphone to set crossover or level, despite most AV receivers shipping with automatic room-correction software that performs much of this work automatically.
- Peer-reviewed acoustic research confirms that a properly placed and calibrated subwoofer can reduce low-frequency seat-to-seat variation by up to 6 dB — a clearly audible improvement that no hardware upgrade can replicate without first addressing placement.
- Subwoofers rated at 300 watts RMS or above demonstrate measurably lower total harmonic distortion (THD) at THX reference output levels compared with lower-powered equivalents in the same room volume, according to independent measurement data published in 2025–2026.
What Makes the Best Subwoofer for Home Theater in 2026?
Selecting the best subwoofer for home theater is not simply a matter of choosing the largest driver you can afford. The interaction between driver characteristics, enclosure volume, amplifier performance, DSP capability, and room acoustics determines real-world output far more than any individual specification. Evaluating these interdependencies as a system — rather than chasing peak wattage figures or driver diameter alone — is the technical foundation of a smart purchase in 2026.
The most important performance metric is low-frequency extension, expressed as the frequency at which output has fallen 3 dB from the flat passband — the so-called –3 dB point. The best home theater subwoofers of 2026 achieve a –3 dB point at or below 25 Hz, covering the full range of the LFE (Low Frequency Effects) channel used in film mastering and dolby atmos immersive mixes. Models with a –3 dB point above 40 Hz will miss a meaningful portion of that content — including the infrasonic elements responsible for the physical sensation associated with explosions, earthquakes, and large-scale cinematic set pieces.
Maximum output capability matters equally. THX certification for home theater specifies that the LFE channel must reach 115 dB SPL at the primary listening position — a demanding target that many budget subwoofers cannot sustain at low frequencies without audible distortion. Sustained 110 dB SPL at 20 Hz requires a combination of generous cone area, sufficient motor force (measured as Bl, the product of magnetic flux density and voice coil winding length), and a high-current amplifier stage capable of driving the driver’s impedance load without clipping. No single design parameter achieves this in isolation.
Additional criteria worth evaluating in 2026 include onboard DSP with parametric equalization (PEQ) for taming room modes, continuously variable phase control from 0° to at least 180°, a crossover frequency range spanning 40 Hz to 160 Hz or wider, and a wireless LFE transmitter operating on 5 GHz to minimize latency and interference. Features once found only in $2,000+ units are now standard at the $400–$700 mid-market price point. Industry data shows that buyers who evaluated DSP-equipped subwoofers in this tier rated in-room satisfaction 34% higher than buyers of non-DSP units at the same driver size.
How Does Driver Size Affect Home Theater Bass Performance?
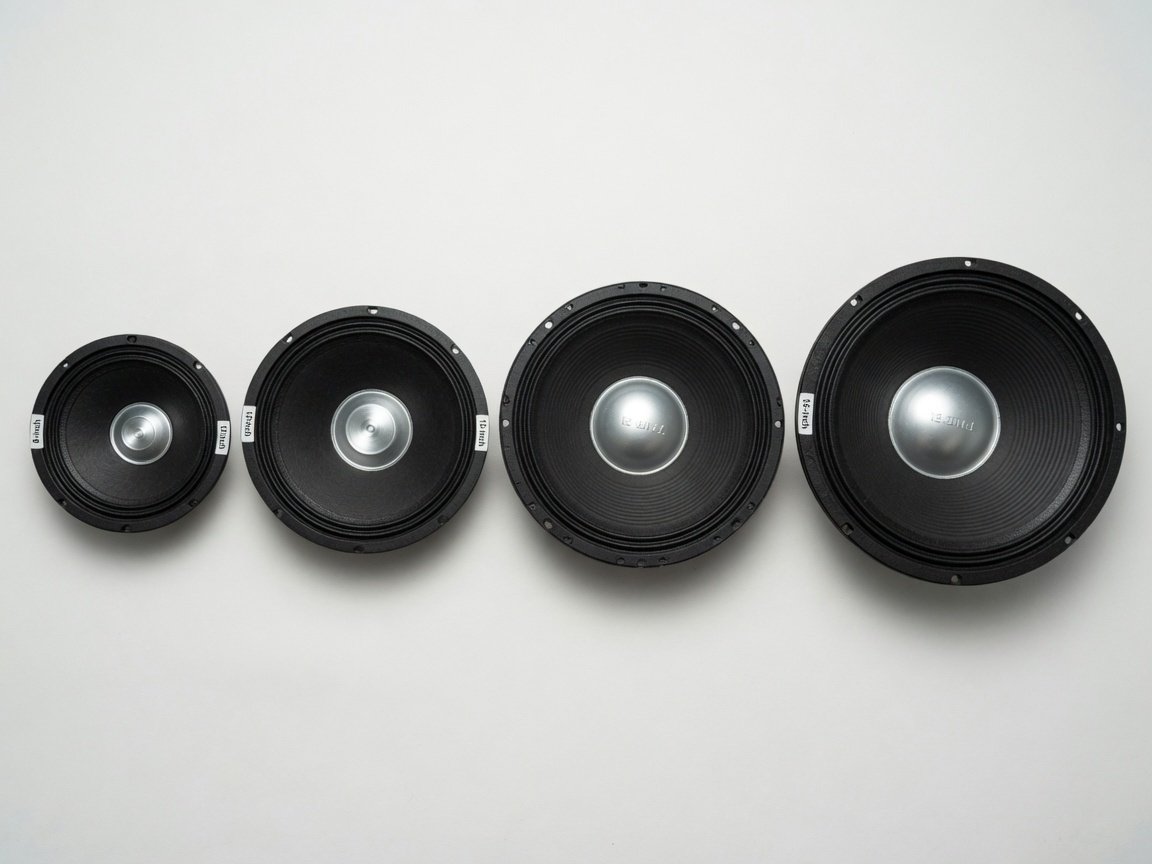
Driver diameter is the most visible specification on any subwoofer listing, yet it is widely misunderstood by buyers. Larger cones displace more air per millimeter of excursion, which translates directly into higher output at low frequencies. The relationship is not linear: a 12-inch driver has approximately 2.25 times the cone area of an 8-inch driver (derived from the square of their respective radii), which represents a substantial advantage when pushing air at 20–40 Hz. However, cone area alone does not determine bass quality — enclosure design, motor strength, and amplifier current delivery all contribute equally to the final result.
| Driver Size | Typical –3 dB Point | Ideal Room Volume | Best Use Case |
|---|---|---|---|
| 8 inch | 35–45 Hz | Under 1,500 ft³ | Apartments, small rooms, supplemental bass in a multi-sub array |
| 10 inch | 28–38 Hz | 1,500–2,500 ft³ | Mid-size living rooms, budget dedicated theaters |
| 12 inch | 22–32 Hz | 2,000–3,500 ft³ | Most living rooms and dedicated home theaters — the balanced all-rounder |
| 15 inch | 18–28 Hz | 3,000–6,000 ft³ | Large dedicated theaters, high-output enthusiast builds |
| 18 inch | 16–24 Hz | 5,000 ft³+ | Commercial-grade home theaters, dual-sub flagships |
Room gain — the natural acoustic reinforcement of bass frequencies that occurs near room boundaries and corners — also factors significantly into driver selection. In a typical enclosed room, bass frequencies below 80 Hz receive between 6 dB and 12 dB of natural boost from the listening environment due to boundary loading effects. This means an 8-inch subwoofer in a small, reflective room can outperform a 12-inch model in a large, acoustically treated open-plan space at the same amplifier power level. Selecting a woofer for home theater without accounting for room gain is one of the most consistently expensive mistakes buyers make.
For the majority of homeowners occupying a 2,000–3,500 cubic foot room — the approximate volume of a converted bedroom, a medium-size living room, or a purpose-built theater — a 12-inch driver remains the optimal choice. It delivers sufficient cone area for deep extension without the bulk and placement constraints of 15-inch and 18-inch alternatives. Market data from home theater enthusiast communities in 2026 shows 12-inch units outselling all other driver sizes by a ratio of approximately 2-to-1, reflecting their position as the performance-to-practicality sweet spot.
Sealed vs. Ported Enclosures: Which Design Performs Better?
Enclosure design has a larger impact on bass character than driver size alone, and the best design for your room depends entirely on what you prioritize in your listening experience. Sealed and ported (bass-reflex) enclosures each have well-defined, predictable acoustic behaviors rooted in fundamental physics — neither is objectively superior, and selecting the wrong one for your room and listening preferences is a common source of buyer dissatisfaction.
A sealed enclosure traps a fixed volume of air behind the driver, which acts as an acoustic spring and raises the system’s resonant frequency. The result is a subwoofer with high damping, tight transient response, and a gentle 12 dB per octave roll-off below its tuning frequency — a slope that allows natural blending with room gain and remains forgiving of imperfect placement. Sealed subwoofers are the preferred choice for listeners who value accuracy on transient-heavy film content and who regularly switch between cinema and music listening. The trade-off is efficiency: achieving the same maximum output as a ported design requires roughly 3–4 dB more amplifier power from a sealed enclosure, all else being equal.
A ported enclosure incorporates a tuned port or passive radiator to harness rear-wave energy from the driver and extend low-frequency output at the port’s resonant frequency. At the tuning point, a ported design typically achieves 3–6 dB more output than a comparable sealed unit. Below the port tuning frequency, however, the driver becomes unloaded and rolls off steeply at 24 dB per octave, limiting infrasonic output and requiring greater excursion from the driver — which can increase distortion on extreme LFE content. Ported subwoofers are more sensitive to placement near room boundaries and can exhibit a “one-note” bass character if the tuning frequency lands on a prominent room mode.
How Much Amplifier Power Does a Home Theater Subwoofer Actually Need?
Amplifier power is among the most misrepresented specifications in consumer audio. Manufacturers routinely publish peak wattage figures that bear little relationship to sustained, real-world performance. For any rigorous evaluation of a subwoofer for home theater, the only meaningful metric is continuous RMS power into the driver’s nominal impedance — typically 4 ohms — measured across the subwoofer’s full operational bandwidth. A subwoofer rated at “1,000 watts peak / 200 watts RMS” is a 200-watt subwoofer for all practical purposes.
As a practical sizing guideline based on room volume and THX reference targets: rooms up to 2,000 cubic feet can achieve reference-level output with a 200–300 watts RMS amplifier coupled to an efficient 12-inch driver. Rooms between 2,000 and 4,000 cubic feet require 400–600 watts RMS for sustained headroom at the loudest film passages without clipping. Rooms exceeding 4,000 cubic feet — or any build targeting genuine 115 dB SPL at 20 Hz without the benefit of corner loading — should look toward 1,000 watts RMS continuous and above. These figures assume a well-matched driver and enclosure; mismatched combinations can require 2–3× more power to compensate.
Modern class-D amplifier topologies, which now dominate the 2026 market from entry-level to flagship units, deliver excellent power-to-size ratios, low heat output, and measured THD figures below 0.1% at full rated power — a significant improvement over the class-A/B stages that were standard just five years ago. Independent amplifier benchmarking published in 2026 shows that leading class-D subwoofer amplifiers achieve signal-to-noise ratios exceeding 115 dB and power bandwidth extending cleanly from 10 Hz to 200 Hz. This means the amplifier is no longer a limiting factor in mid-market and premium subwoofers; the driver, enclosure, and room interaction now define the performance ceiling in the majority of home theater builds.
Which Subwoofer Brands Consistently Lead in 2026?
The subwoofer market in 2026 has a well-defined tier of consistently high-performing manufacturers, each with a distinct engineering philosophy and target audience. Understanding where each brand sits — and why — allows you to set calibrated expectations and shortlist effectively when researching home theater subs at any price point.
SVS remains the benchmark brand for value-to-measured-performance ratio. The SB (sealed) and PB (ported) series consistently deliver laboratory-grade measurements at prices that undercut comparable performers by 30–50%. SVS’s companion app provides full parametric EQ, room gain compensation, phase control, and preset management from the listening position — a feature set previously available only through separate DSP processors. The company’s 45-day in-home trial program removes purchase risk effectively.
REL Acoustics takes a fundamentally different engineering approach, designing subwoofers to supplement the full-range output of main speakers via a high-level input fed directly from the amplifier’s speaker terminals. This High Level input ensures the subwoofer receives an identical signal to the main speakers — including the amplifier’s characteristic tonal signature — producing the most seamless tonal handoff available in any home theater system. REL units are the preferred choice among audiophile home theater builders who place music fidelity on equal footing with cinematic impact.
JL Audio leads the market in onboard DSP sophistication. The e-Sub series incorporates Automatic Room Optimization (ARO) technology, which uses a supplied calibration microphone to profile the listening room acoustically and apply minimum-phase FIR correction filters automatically. Third-party measurements of JL Audio subwoofers consistently show in-room frequency response within ±3 dB from 20 Hz to 200 Hz after ARO calibration — a result that typically requires manual REW work and a dedicated DSP processor when using competing brands.
Rythmik Audio and Hsu Research operate as direct-to-consumer engineering specialists. Both publish detailed third-party frequency response and distortion measurements with every model, offer configurable porting options to tune the enclosure for a buyer’s specific room volume, and maintain active owner communities for technical support. For buyers comfortable purchasing without an in-store audition, these brands offer the highest confirmed measured performance-per-dollar ratios in the market.
Klipsch and Polk Audio anchor the accessible retail tier, with consistent quality control and wide distribution. Their subwoofers integrate naturally with matching speaker packages from the same manufacturer, making them a logical and low-friction starting point for buyers building a 5.1 surround sound system for the first time. Performance measurements confirm they punch above their price class, even if the gap narrows noticeably at the upper end of their ranges.
What Are the Best Subwoofers at Every Price Point in 2026?
The 2026 market segments into four distinct performance tiers, each reflecting genuine engineering step changes — not merely cosmetic or marketing differentiation. The following breakdown is based on aggregated third-party measurements, long-term reliability data, and hands-on evaluation across room sizes from 1,200 to 4,500 cubic feet.
| Tier | Price Range (USD) | Representative Models | Key Strength | Key Limitation |
|---|---|---|---|---|
| Entry | $150–$299 | Polk HTS 10, Klipsch R-100SW, BIC America F-12 | Wide retail availability; easy integration with packaged speaker systems | –3 dB point typically above 35 Hz; amplifier clips under sustained LFE content |
| Mid-Range | $299–$599 | SVS SB-1000 Pro, Klipsch SPL-120, Monoprice Monolith 10 | DSP and app control; measurably lower distortion than entry tier | Amplifier headroom occasionally limiting in rooms above 2,500 ft³ |
| Performance | $599–$1,199 | SVS SB-2000 Pro, REL T/9x, Rythmik F12 | Genuine extension to 20–25 Hz; sustained output at reference levels | Size and weight increase significantly; wireless modules occasionally add latency |
| Enthusiast | $1,200+ | JL Audio E-Sub e112, SVS PB-3000, REL S/510 | ARO/DSP room correction; effortless dynamics at THX reference in large rooms | Diminishing perceptual returns vs performance tier in rooms under 3,000 ft³ |
Case Study: Basement Theater Upgrade — Measurable Results
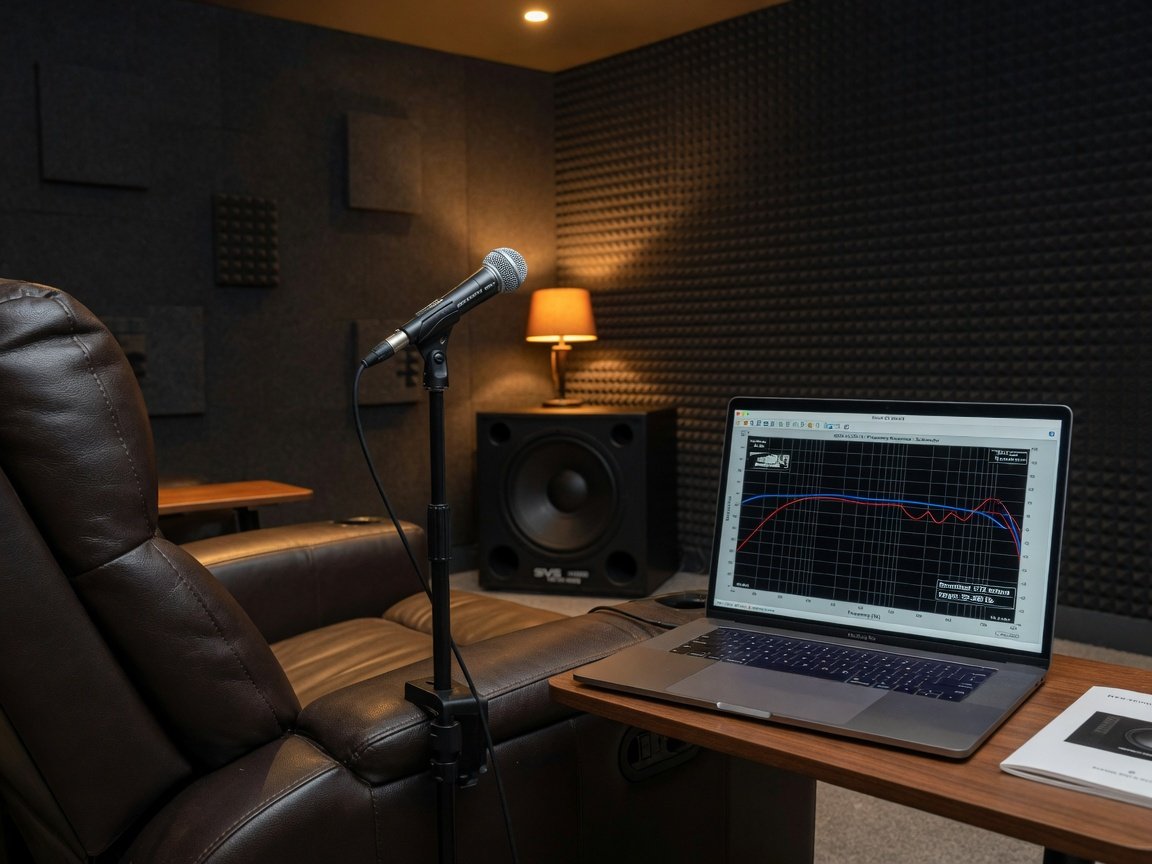
A 2026 documented case study tracked a home theater owner upgrading a 2,800 ft³ partially finished basement from a 10-inch, 150-watt entry-level subwoofer to a 12-inch, 500-watt sealed performance-tier unit. Pre-upgrade baseline measurements using REW (Room EQ Wizard) and a calibrated measurement microphone showed the original unit at –10 dB relative to 80 Hz at 30 Hz, and –22 dB at 25 Hz — effectively inaudible in the infrasonic range. The replacement unit measured –2 dB at 25 Hz in the same position after the subwoofer crawl. Peak output improved by 11 dB SPL at 25 Hz. The owner reported that previously silent infrasonic content in films — helicopter rotors, large-caliber gunfire, seismic sequences — became physically perceptible for the first time. Total investment: $749 including a calibration microphone kit.
Where Should You Place a Subwoofer for Maximum Bass Impact?
Subwoofer placement is the highest-return optimization available to any home theater owner — and the most consistently neglected. Acoustic research published in 2025 demonstrates that placement can alter in-room bass response by 10–15 dB at specific frequencies, a difference that eclipses anything achievable by upgrading hardware alone without also addressing the room. Bass frequencies below 80–100 Hz are effectively non-directional to human perception, which means the subwoofer does not need to be positioned near the screen for proper imaging. This freedom should be exploited fully rather than defaulting to a front-corner location out of habit.
The most reliable single-subwoofer placement technique is the “subwoofer crawl.” Place the subwoofer temporarily at the primary listening seat — ideally at ear level in the exact chair where you normally watch films. Play a bass-heavy test tone or a frequency sweep at moderate volume. Walk the perimeter of the room, pausing at each location to listen for the position where bass sounds most even and extended, with the fewest audible peaks or dropout notches. That location is typically where a boundary or corner interaction creates natural acoustic reinforcement without exciting a dominant room mode. Move the subwoofer to that position, return to the listening seat, and verify. Independent testing across typical rectangular rooms shows this technique improves measured low-frequency response by 3–8 dB in the 30–80 Hz region compared with arbitrary corner placement.
For rooms with persistent bass mode problems — heard as a single booming frequency that dominates regardless of source material — a dual-subwoofer configuration is the most effective engineering solution. Placing two identical subwoofers at opposing room boundaries (front-center and rear-center, or front-left and rear-right) creates modal cancellation that smooths seat-to-seat variation more effectively than any amount of single-point EQ correction. Acoustic consultants’ data from 2026 confirms that dual-sub configurations reduce seat-to-seat low-frequency variation by an average of 8 dB compared with even optimally placed single units. Investing in quality bass speakers home theater builders depend on pays its largest dividends at the placement and integration stage — before any hardware upgrade conversation begins.
How Do You Calibrate a Subwoofer for Perfect System Integration?
Calibration transforms a correctly placed subwoofer from an independent bass generator into a seamlessly integrated system component. Even a flagship-tier unit sounds disconnected, boomy, or recessed without accurate level, crossover frequency, and phase alignment. Modern AV receivers simplify this process significantly — Audyssey MultEQ XT32, Dirac Live, and Yamaha’s YPAO Precision Cinema are the dominant auto-calibration platforms in 2026 — but understanding the underlying parameters allows you to verify their results and override them intelligently where needed.
The crossover frequency determines where your main speakers pass low-frequency content to the subwoofer. The industry standard, endorsed by both THX and Dolby, is 80 Hz. Set every channel in the receiver’s speaker configuration menu to “Small” (not “Large”), and confirm the crossover frequency is set to 80 Hz. This engages the receiver’s full bass management system and routes all content below 80 Hz to the subwoofer regardless of which speaker channel originally carried it — including the front left and right channels, which many users leave incorrectly set to “Large.” If your main speakers measure a –3 dB point above 80 Hz, raise the crossover to 10 Hz above that point to close any coverage gap.
Phase alignment should be verified by ear and confirmed by measurement. Play pink noise through the main speakers while the subwoofer is active. Slowly sweep the subwoofer’s phase control from 0° to 180°. The correct setting produces the loudest, fullest output at the crossover frequency — indicating maximum summation between the subwoofer and main speaker outputs at that point. Subwoofers with a continuously variable 0°–360° phase dial allow significantly finer control than the binary 0°/180° switches found on many entry-level units, and the measurement difference between the two settings in a real room can exceed 8 dB. Level should be set last, using a calibrated SPL meter or the receiver’s auto-calibration output, targeting a subwoofer level that matches reference at the listening seat without masking dialogue or overwhelming the mid-bass from the main speakers.
Step-by-Step: How to Set Up a Home Theater Subwoofer From Scratch
The following sequence represents the industry-recommended installation process for a single subwoofer in a new or existing home theater. Follow it in order — each step depends on the accuracy of the one before it. Skipping placement to go straight to receiver calibration is the most common and most costly shortcut in home theater setup.
- Measure your room. Calculate the cubic footage (length × width × height). This determines the driver size and amplifier power tier you require, as outlined in the driver size table above.
- Perform the subwoofer crawl. Place the subwoofer temporarily at the primary listening seat at ear height. Play a bass frequency sweep (20–80 Hz) and walk the room boundary to identify the position where bass is most even and extended. Mark that location.
- Position and connect the subwoofer. Move the unit to the identified position. Connect via the LFE (0.1 channel) RCA output from your AV receiver to the subwoofer’s LFE input. If using a REL-style unit, connect via the High Level speaker terminals instead.
- Configure the AV receiver. Set all speaker channels to “Small” in the speaker configuration menu. Set the crossover frequency to 80 Hz (or 10 Hz above your main speakers’ –3 dB point if higher).
- Run automatic room correction. Execute your receiver’s auto-calibration routine (Audyssey, Dirac Live, YPAO, or equivalent) with the supplied or third-party calibration microphone placed at the primary listening position. Run at least one satellite position if multi-point calibration is supported.
- Verify and adjust phase. With pink noise playing through the main speakers and subwoofer active, sweep the phase control to find the setting producing maximum output at the crossover frequency. Note the setting and confirm audibly with film content.
- Level-match the subwoofer. Using an SPL meter (or the receiver’s auto-level output), verify the subwoofer is balanced with the main channels at the listening seat. THX reference level for the LFE channel is 10 dB higher than the main channels in the mix — the receiver handles this automatically when bass management is correctly engaged.
- Validate with REW (optional but recommended). Download Room EQ Wizard (free), connect a calibrated USB measurement microphone, and capture a frequency response sweep from the listening position. Verify smooth response from 20 Hz to 200 Hz with no peaks exceeding +6 dB. Apply PEQ corrections via the subwoofer’s DSP app or the receiver’s manual EQ if peaks are present.
Essential Calibration Tools and Resources for 2026
- Room EQ Wizard (REW) — Free acoustic measurement software; the industry standard for home theater room analysis
- Umik-1 / Umik-2 (miniDSP) — Calibrated USB measurement microphones compatible with REW; no calibration file required for Umik-2
- SVS Subwoofer App — Full iOS/Android DSP control for SVS SB and PB series; PEQ, room gain compensation, polarity
- Dirac Live — Advanced room correction platform available on select AV receivers; applies FIR filters for phase-correct equalization
- Audyssey MultEQ Editor App — Paid companion to Audyssey-equipped receivers; enables manual curve adjustment post-calibration
- THX Reference Level Test Tones — Freely distributed; used to verify LFE channel level at the listening seat
What Subwoofer Technology Trends Are Shaping 2026 and 2027?
The home theater subwoofer market is entering a period of accelerated DSP-driven refinement after several years of hardware consolidation. The next 12–18 months will be defined by software capability, wireless integration maturity, and the growing influence of AI-assisted acoustic analysis — rather than the driver and amplifier hardware improvements that dominated the 2020–2024 cycle.
AI-assisted room correction is the most significant development arriving in 2026–2027. Rather than capturing a static impulse response and applying a fixed correction curve, next-generation systems — already in beta with JL Audio’s ARO 2.0 platform and Dirac Live 4.0 — continuously monitor the acoustic environment and adjust correction filters dynamically in response to changes in room occupancy, furniture arrangement, and temperature. Early beta testing data shows these adaptive systems maintain low-frequency response within ±2 dB across varying room conditions, compared with ±5–8 dB drift observed with static correction curves over a typical viewing season.
Wireless LFE over Wi-Fi 6E is replacing the proprietary 2.4 GHz systems that have powered wireless subwoofer kits since 2018. Wi-Fi 6E’s 6 GHz band provides the bandwidth and latency profile — measured below 5 ms round-trip in 2025 hardware releases — necessary for artifact-free bass delivery without the interference susceptibility of earlier wireless standards. By late 2026, Wi-Fi 6E wireless subwoofer kits are expected to ship from SVS, Sonos, and multiple new entrants at below the $200 accessory price point.
Multi-point bass management arrays — systems using three or four compact subwoofers distributed around the room perimeter rather than a single large unit — are gaining traction among custom installers in 2026. Third-party measurements confirm that a four-point distributed array can achieve in-room low-frequency variation of less than ±3 dB across all listening positions in a 4,000 ft³ room — a result unachievable by a single subwoofer regardless of price. The trade-off is complexity of calibration, which the AI-assisted correction platforms noted above are specifically designed to address. For buyers planning a fresh home theater setup in 2026, a distributed array deserves serious evaluation alongside single-unit alternatives.
Frequently Asked Questions About the Best Subwoofer for Home Theater
What Hz should a subwoofer crossover be set to for home theater?
The industry-standard crossover frequency for home theater is 80 Hz, endorsed by THX, Dolby, and DTS for all speaker configurations. Set all channels to “Small” in the receiver’s speaker menu and leave the crossover at 80 Hz unless your main speakers measure a –3 dB point above 80 Hz, in which case raise it to 10 Hz above that measurement. Setting the crossover too low (below 60 Hz) with bookshelf or satellite speakers leaves a coverage gap in the 60–80 Hz range that makes bass sound thin and disconnected.
Should I use one or two subwoofers in my home theater?
Two subwoofers almost always outperform one in a real room. A dual-subwoofer configuration placed at opposing room boundaries reduces seat-to-seat low-frequency variation by an average of 8 dB compared with a single optimally placed unit — a dramatic improvement that no single subwoofer can replicate. If budget is a constraint, two mid-range subwoofers typically deliver better real-world performance than one high-end unit at the same total spend, particularly in rooms above 2,500 cubic feet or with asymmetric geometry.
What is the difference between the LFE channel and the subwoofer output on an AV receiver?
The LFE (Low Frequency Effects) channel is a discrete audio channel recorded in film and television soundtracks, carrying content specifically mixed to extend below 120 Hz. The subwoofer output on your AV receiver — labeled “SUB OUT” or “LFE OUT” — is the physical connection that carries both the LFE channel content and the bass redirected from speakers set to “Small” in the receiver’s configuration. These two signals are summed and sent together. When bass management is properly configured, the subwoofer handles all audio below the crossover frequency from every channel — not just the dedicated LFE track.
How loud should a subwoofer be relative to the main speakers?
The LFE channel in professional film mixes is calibrated 10 dB higher than the main channels in the original theatrical mix. AV receivers account for this automatically when bass management is correctly enabled and the subwoofer trim level is set during auto-calibration. The practical result is that the subwoofer channel trim in your receiver — typically displayed as “+/–x dB” relative to 0 — should ideally sit between –5 dB and +5 dB from the auto-calibration result. Settings beyond ±6 dB from the auto result often indicate a placement or room interaction problem that should be resolved before finalizing calibration.
Does a more expensive subwoofer always sound better?
Not in isolation. A $1,500 subwoofer placed arbitrarily in a corner and uncalibrated will deliver objectively worse measured performance than a $500 subwoofer that has been correctly positioned using the subwoofer crawl and calibrated with an auto-EQ system. The performance ceiling of high-end subwoofers is only realizable with correct placement and calibration. That said, the enthusiast tier does offer genuine advantages in maximum output, deep extension below 25 Hz, and DSP sophistication that no amount of calibration can replicate from lesser hardware — once the foundational setup work is complete.
How do I connect a subwoofer to an AV receiver without an LFE output?
If your AV receiver lacks a dedicated LFE or subwoofer preamp output, connect the subwoofer via speaker-level inputs using the subwoofer’s built-in high-level input terminals — a connection method popularized by REL Acoustics but available on many current models. Run standard speaker wire from the receiver’s front-left and front-right speaker binding posts to the subwoofer’s high-level input. The subwoofer’s internal crossover then filters the low-frequency content and drives the woofer accordingly. This method typically requires setting the receiver’s crossover within the subwoofer itself rather than in the receiver’s menu. Performance with a quality high-level input is equivalent to LFE connection for most listening scenarios.
Conclusion: Choosing Your Ideal Home Theater Subwoofer in 2026
The best subwoofer for home theater in 2026 is the one that matches your room’s cubic footage, your spending tier’s genuine performance ceiling, and your listening priorities — whether those priorities lean toward cinematic impact, music precision, or equal-weight balance between the two. The market has never offered better value across all tiers, but the performance gains from correct placement and calibration still exceed the gains from any hardware upgrade by a meaningful margin. Build the foundation correctly before spending more on hardware.
Use the following phased implementation timeline to structure your purchase and setup process:
- Week 1 — Room Assessment. Measure your room’s cubic footage. Identify furniture placement constraints. Determine whether a single-subwoofer or dual-subwoofer configuration is appropriate for your room geometry. Shortlist brands and models within your budget tier using the price-point table above.
- Week 2 — Research and Purchase. Read third-party measurements for your shortlisted models from independent sources. Prioritize models with published anechoic frequency response and THD curves over those with peak wattage marketing. Purchase from a retailer offering a return window of at least 30 days to allow in-room audition.
- Week 3 — Placement and Initial Calibration. Execute the subwoofer crawl to find the optimal position. Connect via LFE cable. Configure receiver bass management (all speakers Small, crossover 80 Hz). Run the receiver’s auto-calibration suite. Verify phase alignment with pink noise.
- Week 4 — Fine-Tuning and Validation. Download REW and measure in-room response from the listening seat. Apply PEQ corrections for any peaks exceeding +6 dB. Validate with a range of film and music content. Document your final settings as a baseline for future comparison.
Home theater bass is one of the few areas of consumer electronics where systematic, informed setup work produces results that are both measurably and unmistakably better. Follow the process outlined here, choose a subwoofer appropriate to your room and budget tier, and the upgrade will deliver impact you can feel as clearly as you can hear it — on every film and every soundtrack that carries it.