Hiring the right home theater installer is the most consequential decision in any dedicated cinema room project. A qualified professional brings structured cabling expertise, acoustic measurement methodology, and display calibration precision that consumer-grade DIY approaches consistently fail to replicate. Whether you are planning a compact media room or a fully engineered home theater setup, this guide covers the complete process for 2026 — from verifying installer credentials and comparing project costs to understanding exactly what a professionally calibrated room should technically deliver.
Executive Summary
- Professional home theater installations range from $3,000 for entry-level media rooms to well over $100,000 for reference-grade cinema suites.
What Does a Professional Home Theater Installer Do?
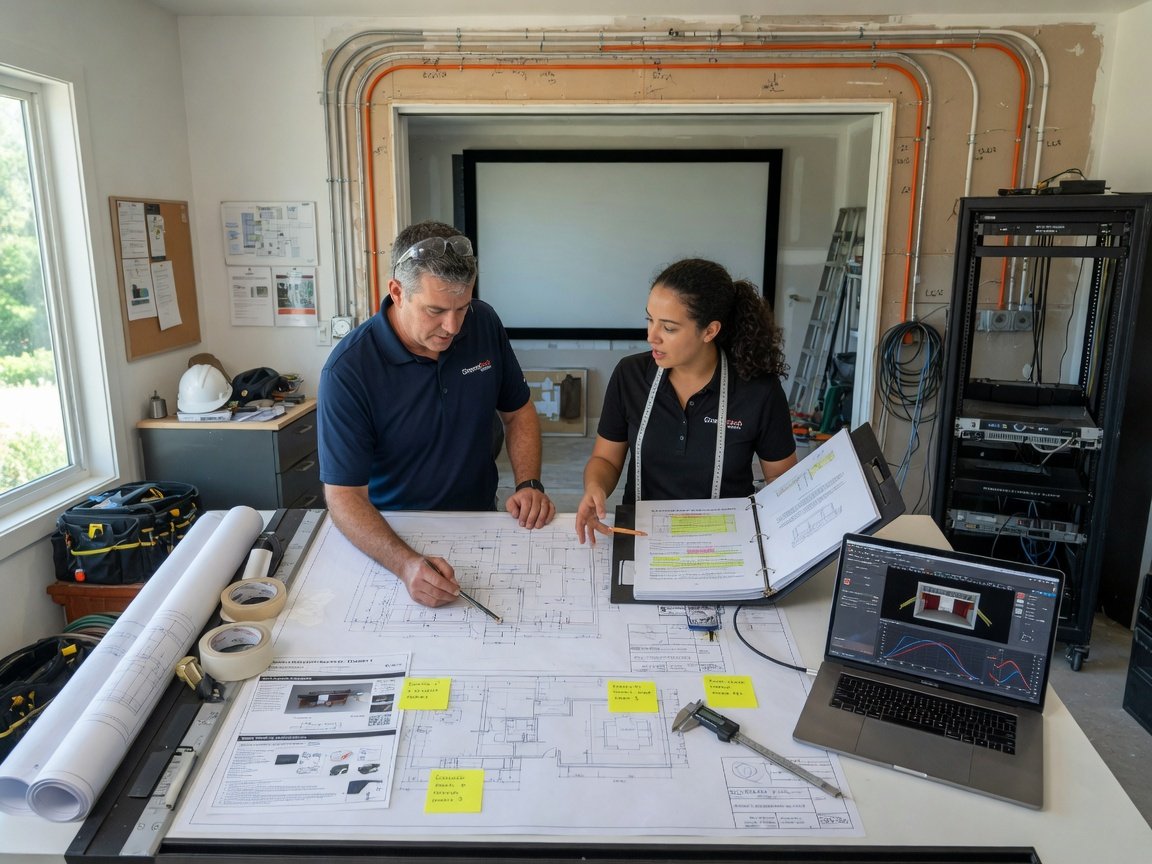
A professional home theater installer is a specialist who designs, specifies, installs, and calibrates complete audio-video systems within a residential space. The role extends far beyond mounting a display or routing an HDMI cable. A certified installer manages the full technical stack: structured cabling runs using HDMI 2.1, fiber optic, Cat6A, and coaxial cable; speaker placement derived from ITU-R BS.775 multichannel positioning standards; display calibration using professional colorimetry instruments; AV rack integration and equipment sequencing; control system programming for unified single-interface operation; and acoustic treatment consultation grounded in measured room behavior. According to CEDIA’s 2026 installer competency framework, a certified professional is trained to deliver a room that meets or exceeds THX Certified Home Theater room geometry and performance benchmarks — a standard that ad hoc self-installation rarely approaches. In complex builds, the lead installer coordinates a team that may include a dedicated cable technician, rack integrator, ISF calibrator, and control system programmer, each contributing a distinct discipline to the finished system. This division of labor is precisely why professionally installed rooms perform at a categorically different level than consumer-assembled setups of equivalent equipment value.
How Much Does a Professional Home Theater Installation Cost in 2026?
Installation cost is the most variable factor in any home theater project and also the most frequently misquoted. Pricing depends on room size, equipment tier, cabling complexity, acoustic treatment scope, and the calibration services the contract includes. The range spans three distinct and clearly defined tiers. Entry-level setups in existing rooms with minimal cabling work start around $3,000. Mid-range dedicated theater rooms with proper acoustic treatment, a 4K laser projector, and a Dolby Atmos speaker array typically fall between $15,000 and $45,000. Flagship cinema suites featuring custom millwork, THX-certified acoustic engineering, reference-grade laser projection, and full control system integration regularly exceed $100,000. Always request an itemized quote that separates equipment, cabling, labor, calibration, and ongoing support contract costs — a single bundled number makes meaningful comparison between competing proposals impossible.
| Installation Tier | Typical Budget Range | Display Type | Audio Configuration | Acoustic Treatment | Calibration Included |
|---|---|---|---|---|---|
| Entry-Level | $3,000 – $8,000 | 75″–85″ 4K LED / OLED TV | 5.1 or 7.1 surround | Minimal / none | Auto (Audyssey / YPAO) |
| Mid-Range | $15,000 – $45,000 | 4K Laser Projector, 110″–130″ AT screen | 7.2.4 Dolby Atmos | Broadband panels + bass traps | ISF display + Dirac Live audio |
| Reference | $50,000 – $150,000+ | 4K Laser Projector, 130″–175″+ AT masking screen | 9.2.6 Dolby Atmos / Auro-3D | Full acoustic engineering | ISF + full anechoic measurement suite |
What Certifications Should a Home Theater Installer Hold?
Certifications indicate whether an installer has been trained to a recognized industry standard — or is operating entirely on self-reported field experience. The benchmark credential for the residential AV industry is the CEDIA Certified Technician (CT), covering low-voltage cabling, system design, audio-video calibration fundamentals, and control system basics. Above it sits the CEDIA Certified Professional (CP) designation, requiring documented field experience and a proctored examination. For display calibration specifically, the Imaging Science Foundation (ISF) Certified Technician credential is widely regarded as the industry gold standard — an ISF-calibrated display has been measured and adjusted against D65 white point, target gamma curves, and color space accuracy using professional spectroradiometry instruments. THX’s Certified Professional Installer program addresses room acoustics, speaker placement geometry, and system performance benchmarking. For smart-home integrated builds, Control4 Certified and Crestron Masters Certified designations are the relevant benchmarks for control system competency. This makes the CEDIA credential a particularly strong differentiator when evaluating competing proposals. Always request certificate numbers and verify them directly with the issuing body before signing any agreement.
How Do You Find and Evaluate a Qualified Home Theater Installer?
Finding a qualified installer starts with CEDIA’s Installer Locator, which lists certified professionals by location with current certification status displayed. Beyond the directory listing, proper evaluation requires a structured vetting process. Request references from at least three completed projects comparable in scope to yours, and ask to visit a finished installation if the prior client permits. A legitimate installer will provide a written scope of work, a CAD or elevation drawing showing speaker placement geometry, and a preliminary room analysis report before any contract is signed. Be cautious of installers who offer pricing without first conducting a site visit — room-specific variables including wall construction type, HVAC noise floor, existing infrastructure condition, and structural mounting constraints all materially affect both project cost and technical complexity. Nail down every deliverable — calibration reports, as-built documentation, control system programming backups, and support terms — in writing before any deposit is paid. Ask specifically which technician will perform the calibration, not just who will manage the overall installation.
What Room Characteristics Does an Installer Assess Before Starting?
The physical room dictates the entire system design. A professional installer conducts a detailed room survey before specifying any equipment. Key measurements include room dimensions and aspect ratio, parallel surface geometry that generates flutter echo, primary low-frequency room modes, HVAC noise floor, ambient light levels at the screen position, and structural constraints for speaker and screen mounting. The optimum home theater room follows an aspect ratio close to 1:1.28:1.54 (width-to-length-to-height) as specified by the International Telecommunication Union for multichannel critical listening environments. In practice, most residential rooms require acoustic compensation through a combination of physical treatment and electronic correction. A professional room analysis uses a calibrated omnidirectional measurement microphone and acoustic analysis software to map reverb time (RT60), frequency response at the primary listening position, and ambient background noise level. CEDIA’s residential installation standards specify a maximum background noise level of NC-30 (Noise Criterion 30) for a dedicated home theater — roughly equivalent to the ambient noise level of a quiet library. Room preparation is therefore an active requirement for the vast majority of projects.
What Equipment Does a Professional Home Theater Installer Specify?
Equipment specification follows room analysis and client brief — never the reverse. A professional installer selects hardware to match the room’s physical constraints and the client’s measurable performance target, not a preferred brand list or package tier. For projection, 4K laser projectors delivering 3,000 ANSI lumens or more are the current reference standard for rooms with screen sizes above 120 inches or environments with controlled ambient light challenges. Acoustic-transparent (AT) screens allow left, center, and right front speakers to be positioned directly behind the screen surface, maintaining ITU-R standard speaker angles without any visual compromise to the image. For audio, a minimum 7.2.4 Dolby Atmos speaker configuration is the established baseline for contemporary immersive audio in rooms above 300 square feet. Subwoofer placement is always determined by room mode analysis — optimal positions based on measured data frequently differ dramatically from intuitive choices. AV receivers or separate pre-amplifier and multichannel power amplifier configurations are selected based on impedance matching, continuous power requirements per speaker channel, and signal processing platform compatibility. As of 2026, network infrastructure — dedicated gigabit AV switching, VLAN-segmented media networks, and fiber HDMI 2.1 distribution capable of 48 Gbps — is considered a standard component of any new-build professional installation.
| Component | Entry-Level Spec | Mid-Range Spec | Reference Spec |
|---|---|---|---|
| Display | 75″–85″ 4K OLED or QLED TV | 4K Laser Projector, 3,000+ ANSI lm | 4K Laser Projector, 5,000+ ANSI lm, 3-chip or laser phosphor |
| Screen | N/A | 110″–130″ Acoustic-Transparent Fixed-Frame | 130″–180″ AT Motorized Masking Screen |
| Audio | 5.1 surround | 7.2.4 Dolby Atmos | 9.2.6 Dolby Atmos / Auro-3D |
| Processing | AV Receiver with auto-EQ | AV Receiver + Dirac Live room correction | Separate Pre/Pro + Power Amplifiers + Trinnov or Dirac Live |
| Control | Manufacturer app / IR remote | Control4 Essentials or URC | Crestron or Control4 full integration with Lutron lighting |
| Calibration | Auto-EQ (Audyssey / YPAO) | ISF display + Dirac Live audio | ISF display + full anechoic measurement suite |
| Network | Standard home router | Dedicated gigabit AV switch, VLAN segmented | Fiber HDMI 2.1 distribution, 48 Gbps backbone |
What Is the Step-by-Step Professional Installation Process?
A professional installation follows a structured, sequential process designed to prevent rework and ensure each stage builds on verified, documented prior work. The complete process typically spans 5 to 10 business days for a mid-range dedicated home theater room. Understanding this sequence allows clients to set accurate timeline expectations and ask precise, informed questions during the proposal review stage. Larger reference-grade builds with custom millwork and complex control integration may extend to three or four weeks of active work.
- Site Survey and Room Measurement (Day 1): The lead installer conducts a full acoustic measurement session using calibrated omnidirectional microphones, documents all cable routing paths, photographs the space for as-built records, and confirms structural mount points. No equipment is specified as final until this data is collected and reviewed.
- Structured Cabling Rough-In (Days 1–2): All conduit, junction boxes, and wall plates are installed before any finishing surfaces are closed. HDMI 2.1, speaker wire, Cat6A, subwoofer interconnects, and control system cabling are pulled simultaneously, labeled at both ends, and continuity-tested before walls are sealed — ensuring faults are caught before they become expensive to fix.
- Acoustic Treatment Installation (Days 2–3): Broadband absorption panels, bass traps, and rear-wall diffusers are installed at positions determined by the room measurement data. A post-treatment measurement confirms RT60 is trending toward the target range of 0.20 to 0.40 seconds before work advances.
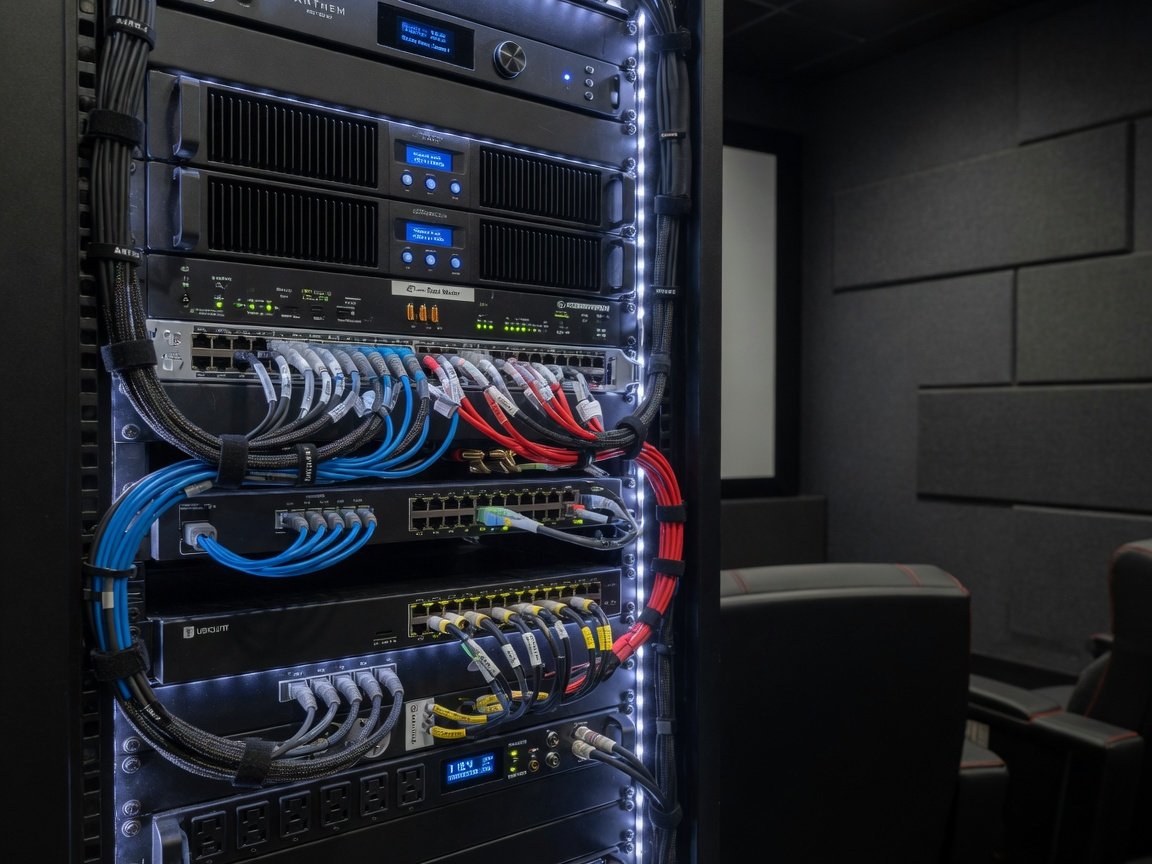
- Equipment Rack Assembly and Pre-Configuration (Days 2–4, concurrent): The AV rack is assembled and pre-wired in a controlled off-site environment where components can be powered, tested, and firmware-updated before entering the finished room. IP addressing, network configuration, and device registration are completed at this stage.
- Display and Speaker Mounting (Days 4–5): The projector is mounted at the calculated throw distance and vertical offset. Speakers are positioned per ITU-R standard angles: ±30° for left and right front, ±110° for surround channels, and ±60° to 100° for ceiling channels. All hardware is torqued to specification and photographically documented.
- Rack Integration and Wiring Termination (Days 5–6): The pre-configured rack is installed in the room and all cable terminations are completed. Every connection is labeled, tested for signal integrity, and photographed for the as-built documentation package.
- Control System Programming and Network Commissioning (Days 6–7): The control interface is programmed to the client’s usage profile — single-button scene activation, source switching, volume control, and lighting integration are configured and stress-tested across a minimum of 100 activation cycles before sign-off.
- AV Calibration and Measurement Verification (Days 7–8): ISF display calibration is performed using a professional spectroradiometer. Dirac Live or equivalent room correction software captures the full-band impulse response and generates correction filters. Final acoustic and display measurements are logged and included in the calibration report delivered to the client.
- Client Walkthrough and Documentation Handover (Days 8–10): The client receives a complete system orientation covering operation, common troubleshooting, and maintenance schedule. The full documentation package — as-built diagrams, equipment serial numbers, calibration reports, network configuration records, and control system backup files — is delivered in both print and digital formats.
How Do Acoustics Drive Professional Home Theater Quality?
Acoustic performance is the most under-specified element in residential home theater projects and the primary differentiator between an average room and a reference-quality cinema experience. No quantity of expensive hardware compensates for uncontrolled early reflections, excessive bass resonance, or a reverb time outside the target range for the room’s size. The reference RT60 for a dedicated home theater sits between 0.20 and 0.40 seconds per ITU-R BS.1116 recommendations for critical listening environments. Achieving this requires broadband absorption panels at all first-reflection points, bass traps at room corners and wall-ceiling junctions where low-frequency energy accumulates most heavily, and diffusive surfaces on the rear wall to maintain spatial character while eliminating discrete echo returns. A professional installer either partners with an acoustic consultant or uses validated acoustic modeling software to predict room behavior before selecting treatment materials. In rooms where construction constraints limit passive treatment depth, digital room correction systems such as Dirac Live, Audyssey MultEQ XT32, or Trinnov Altitude processing provide measurable improvements across the full frequency range. Physical absorption addresses problematic low-frequency modes more effectively than digital correction applied to an untreated room — establishing physical treatment as the non-negotiable foundation that digital tools refine rather than replace.
What Are the Most Common Home Theater Installation Errors to Avoid?
Understanding common installation errors helps clients ask sharper questions during the vetting process and recognize whether a proposal reflects genuine technical rigor. These errors occur across both self-installed and professionally contracted systems when standard processes are bypassed or scope corners are cut to meet a budget target.
- Running passive HDMI beyond 15 feet: Signal degradation becomes measurable on passive copper HDMI 2.1 at 4K/120 Hz beyond 15 feet. Professional installations use active optical HDMI cables or HDMI-over-fiber extenders for longer runs — a specification that must appear in the cabling plan, not be decided on site.
- Placing subwoofers by convention rather than measurement: The front-wall center position is the most common default subwoofer location and frequently the worst-measured one. Room mode analysis identifies the two or three positions where combined response is flattest at the primary listening seat — these rarely match intuition.
- Underspecifying speaker cable gauge: Resistance accumulates over long cable runs, especially at low speaker impedances. A professional installer calculates the correct AWG for each individual run, keeping total resistance below 5% of nominal speaker load impedance — a calculation rarely performed in consumer installations.
- Mounting the projector without throw ratio verification: Throw ratio, screen gain, and ambient light levels must be verified together before mounting brackets are drilled. A projector installed at the wrong throw distance requires remounting — one of the more expensive post-installation corrections.
- Omitting a dedicated 20-amp circuit: AV equipment racks draw significant sustained current. Sharing circuits with other household loads elevates the noise floor and introduces ground loop hum artifacts that are audible on high-sensitivity speaker systems.
- Installing acoustic panels without measurement data: Treatment placed by visual symmetry alone rather than by measured first-reflection points is significantly less effective, because first-reflection geometry rarely aligns with visually symmetric positions on irregular room surfaces.
- Failing to deliver as-built documentation: Undocumented installations make every future service call, equipment upgrade, and fault diagnosis significantly more expensive. The absence of documentation in a standard deliverables list is a reliable signal of an under-resourced or under-professionalized operation.
What Trends Are Shaping Home Theater Installation in 2026–2027?
The home theater installation industry is evolving rapidly as hardware capabilities, content delivery infrastructure, and client expectations converge at a new baseline. Several technical and commercial trends are redefining what a professional installer is expected to design, specify, and deliver in 2026 and into 2027.
- Laser projection becomes the default: 4K laser projectors have become the dominant display choice at the mid-range tier and above, displacing lamp-based projectors market-wide. Laser sources deliver rated lifespans exceeding 20,000 hours, improved color gamut coverage well beyond DCI-P3, and consistent brightness output without the degradation cycles that lamp replacement required.
- 8K infrastructure readiness: While 8K content delivery remains limited in 2026, professional installers are routing fiber optic HDMI 2.1 infrastructure capable of 48 Gbps to support 8K/60 Hz delivery as content scales. Building 8K-ready infrastructure at rough-in adds modest cost over standard 4K cabling — but retrofitting post-construction is considerably more expensive.
- Dolby Atmos overhead speaker adoption accelerates: Overhead speaker adoption has grown substantially, driven by falling hardware costs and growing client awareness of object-based audio.
- Deep smart home integration becomes standard: Control4, Crestron, and Lutron lighting integration are increasingly treated as standard deliverables rather than optional add-ons in projects above $30,000. Clients in 2026 expect coordinated scene activation — display, audio, lighting, motorized shades, and HVAC adjusting simultaneously from a single button press or voice command.
- Measurement reports as contractual deliverables: Professional acoustic and display measurement reports — generated using Room EQ Wizard, Dirac Live analysis exports, or equivalent calibration software outputs — are becoming standard contractual deliverables driven by increased client technical sophistication and intensifying competition among certified installers who need to differentiate on documented outcome quality.
Frequently Asked Questions About Home Theater Installers
How do I verify that a home theater installer is CEDIA certified?
Use CEDIA’s Installer Locator to search by name, company name, or geographic location. Each listing displays the current certification status and the specific credential held. Ask the installer for their certification number and cross-reference it directly on the CEDIA website — certification numbers are unique to each individual and verifiable in real time without contacting CEDIA directly.
How long does a professional home theater installation take from start to completion?
A standard mid-range dedicated theater room typically takes 5 to 10 business days from the first day of on-site work through calibration sign-off and documentation handover. Larger custom builds incorporating bespoke millwork, custom acoustic treatment fabrication, and complex multi-zone control system programming can extend to 3 to 4 weeks. Reference-grade flagship projects with significant architectural integration may run 6 to 8 weeks of active work.
Do I need a dedicated room to justify hiring a professional home theater installer?
No — but a dedicated room consistently achieves significantly better acoustic and optical performance because it eliminates multi-use compromise layouts and allows complete acoustic treatment. A professional installer can optimize a living room or open-plan space, but background noise floor, parallel reflective surfaces, multi-use furniture constraints, and uncontrolled ambient light will limit the measurable result to roughly one to two performance tiers below what a dedicated treated room achieves with the same hardware.
What is the difference between ISF display calibration and Audyssey automatic calibration?
ISF calibration is a manual process performed by a trained technician using professional spectroradiometry instruments. It adjusts every parameter in the display’s image processing chain — white point, gamma, color space, grayscale tracking, color management — to match defined reference standards measurably. Audyssey is an automated microphone-based speaker and room correction system built into many AV receivers. Both address different domains: ISF corrects display accuracy; Audyssey corrects speaker-room interaction in the audio domain. A complete professional installation incorporates both, along with physical acoustic treatment as the foundation.
Can a professional home theater installer assess and improve an existing system?
Yes. Many CEDIA-certified installers offer structured system audits — a documented technical assessment of an existing setup that identifies measurable performance gaps and prioritizes remediation by return on investment. A good audit separates genuine hardware limitations from installation deficiencies, which prevents unnecessary equipment replacement and focuses remediation spend where it produces the highest measured improvement per dollar.
What should a final home theater installation documentation package include?
At minimum: as-built cable routing diagrams for every wire in the system, equipment serial numbers and warranty registration records, control system programming backup files, network IP addressing and VLAN configuration documentation, ISF calibration reports for the display (including pre- and post-calibration colorimetry measurements), and acoustic measurement exports covering RT60, full-band frequency response, and impulse response from the audio calibration session. Both print and digital delivery of this package is a reasonable contractual expectation for any project above $10,000.
Next Steps: How to Move Forward With a Home Theater Installer in 2026
A well-executed professional home theater installation demands preparation, specification rigor, and the right installer — in precisely that order. The seven-step sequence below provides a structured roadmap for moving from initial concept to a calibrated, fully documented system ready for long-term operation.
- Define your performance target and budget ceiling before contacting any installer — knowing your target screen size, audio configuration, and total investment ceiling enables meaningful, like-for-like comparison between competing proposals.
- Use the CEDIA Installer Locator to identify certified professionals in your area and verify active certification status before scheduling any site visits or discussions.
- Request proposals from at least three candidates, each of which must include an itemized cost breakdown, preliminary room analysis findings, a speaker placement diagram, and a stated calibration methodology.
- Verify all certifications directly with the issuing bodies: CEDIA for installation credentials, ISF for display calibration competency, THX for acoustic design, and Control4 or Crestron for control system integration.
- Review every proposal’s scope of work for completeness: cabling plan, speaker placement drawing, acoustic treatment specification, calibration methodology, measurement report deliverables, and post-installation documentation package must all be explicitly named.
- Confirm timeline and daily site access requirements before signing — a 5 to 10 day installation requires sustained daily site access and clear communication about which trades need to precede or follow the AV team.
- Schedule an independent post-installation measurement review to verify that the delivered room meets the performance specifications written into the contract — a critical step that separates a professionally completed project from one that merely looks finished.
The investment in professional home theater installation is not simply a purchase of superior hardware performance. It is the purchase of a room that performs correctly from day one, remains serviceable and upgradeable over a decade, and is documented well enough to support every future service visit or technology refresh without diagnostic uncertainty. At hometheaterinfoline.com, the guidance throughout this guide reflects that standard — and the standard every certified professional installer should be held to in 2026.