Setting up a home theater system in 2026 is more achievable than ever — yet most first-time builders get it wrong. Whether you’re starting a fresh home theater setup or overhauling an existing room, the difference between average and exceptional results comes down to three factors: equipment selection, precise spatial calibration, and a clean signal chain. This guide walks through every technical step so you can build a cinema-grade system without costly trial and error.
Executive Summary
- Market scale: Sub-$500 Dolby Atmos receivers and widespread 4K OLED availability have made cinema-grade home theater more accessible than ever in 2026.
- Room acoustics matter most: Room treatment can have a greater performance impact than upgrading from a $500 to a $2,000 speaker system — yet it remains one of the most commonly overlooked elements at build time.
What Equipment Do You Need to Set Up a Home Theater System?
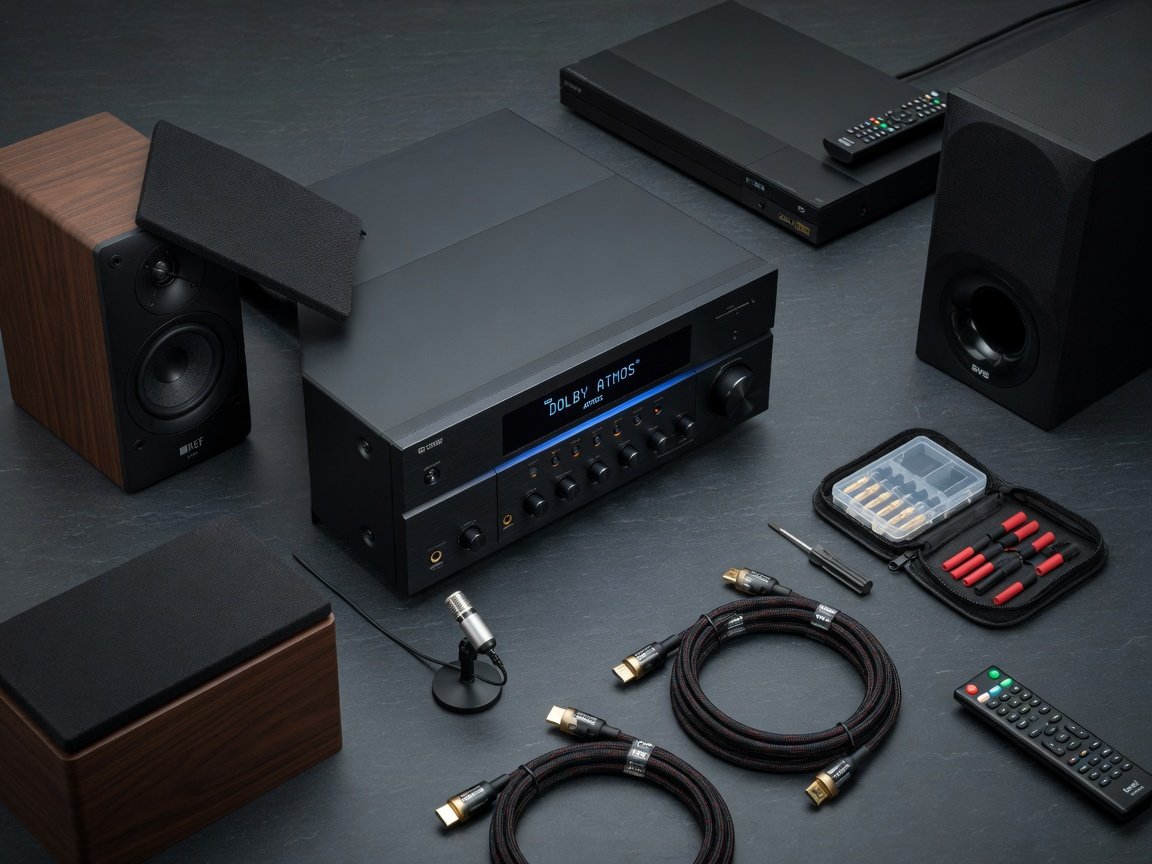
Every home theater system is built on five core components. Each plays a distinct technical role, and choosing the right tier for your budget determines long-term satisfaction. In 2026, the entry-level market has matured significantly — a competent 5.1 Dolby Atmos system can be built for under $1,500 without sacrificing HDMI 2.1 compatibility or discrete surround decoding.
| Component | Function | Entry Level (2026) | Mid-Range (2026) | Premium (2026) |
|---|---|---|---|---|
| AV Receiver | Central hub — decodes audio, switches video, powers speakers | $300–$500 | $600–$1,200 | $1,500–$4,000+ |
| Display | Picture output — TV or projector | $400–$800 (65″ 4K LED) | $900–$2,500 (OLED/QLED) | $3,000+ (OLED evo / MicroLED) |
| Speaker System | Discrete surround sound reproduction | $300–$600 (5.1 package) | $700–$2,000 (separates) | $2,500+ (floorstanders) |
| Subwoofer | Low-frequency extension below 80 Hz | $150–$300 | $350–$700 | $800–$3,000+ |
| Source Device | Content delivery — streaming, Blu-ray, gaming | $50–$150 (streaming stick/box) | $200–$400 (4K Blu-ray player) | $400+ (flagship UHD player) |
The AV receiver is the most critical purchasing decision in the entire build. It must support HDMI 2.1 (for 4K/120Hz pass-through), Dolby Atmos and DTS:X decoding, and your target channel configuration — whether 5.1, 7.1, or 7.2.4 Atmos. The receiver defines what your speakers can deliver — not the other way around.
Beyond the core five, plan for these supplementary components: a surge protector with a minimum 2,400-joule rating for AV equipment, HDMI cables certified for 48 Gbps bandwidth (Ultra High Speed HDMI), a calibration microphone for automated room correction, and acoustic panels if your room has parallel hard surfaces. Acoustic treatment is often treated as an afterthought rather than a build requirement. Factor it into the original budget to avoid retrofitting.
How Do You Choose the Right Room and Layout for Your Home Theater?
Room selection is the single most impactful decision in the entire build process. A dedicated room with controlled acoustics outperforms any amount of hardware investment placed in a poor acoustic environment. The ideal home theater room is rectangular, has a length-to-width ratio between 1.4:1 and 1.6:1, and has no parallel hard surfaces that create flutter echo at mid and high frequencies.
Room dimensions directly affect bass response through modal resonance. The three primary room modes — axial, tangential, and oblique — interact to create peaks and nulls at predictable frequencies. A problematic configuration is any room where the width equals exactly half the length, producing severe bass buildup at the room’s fundamental frequency. Use online room mode calculators or the Bolt Area diagram to evaluate candidate rooms before finalising a build location. This takes thirty minutes and saves months of remediation work.
Ambient light control is the second critical selection factor. A projector-based system requires near-total darkness for peak contrast performance, while a direct-view display tolerates moderate ambient light. North-facing rooms with blackout window treatments are the most practical choice for projector builds.
Ceiling height matters significantly for Dolby Atmos configurations. Height channel speakers — whether ceiling-mounted or upward-firing Atmos modules — require a minimum of 8 feet of ceiling height to generate a convincing overhead sound field. Rooms with 9-foot or higher ceilings deliver measurably better height channel separation. Seating arrangement follows the display: a single row works for rooms up to 15 feet deep, while rooms over 18 feet can support a tiered two-row layout with a 12–18 inch riser for the rear row.
How Should You Position Your Display for the Best Picture?
Display positioning determines viewing comfort and picture accuracy more than display size alone. The Society of Motion Picture and Television Engineers recommends a minimum 30-degree horizontal field of view for a cinematic experience, with THX guidelines pushing this to 36 degrees or higher. For a 65-inch display, the optimal viewing distance is approximately 8 to 10 feet; a 77-inch display works best at 9.5 to 12 feet; an 85-inch display at 10.5 to 14 feet.
Screen height positioning is one of the most frequently miscalculated variables. The center of the display should align with the viewer’s eye level when seated — typically 42 to 48 inches from the floor for standard sofa seating. Mounting a television above a fireplace forces the neck into an extended position, degrading both comfort and perceived contrast ratio on any panel technology.
For projector-based systems, throw ratio determines the required projector-to-screen distance. A standard 1.5:1 throw ratio projector produces a 120-inch image from approximately 15 feet. Short-throw projectors at 0.3–0.5:1 ratio reduce this to 2–3 feet, enabling 120-inch images in compact rooms. Screen gain affects brightness and off-axis performance: a 1.0 gain screen provides the most accurate color reproduction across wide viewing angles, while high-gain screens (1.5–2.0) trade off-axis performance for brighter images in rooms with residual ambient light.
How Do You Set Up Surround Sound Speakers Correctly?
Speaker placement follows precise angular guidelines defined by Dolby, DTS, and the ITU-R BS.775 international standard. These angles are not suggestions — they are the geometries at which each speaker was designed to operate. The most widely adopted configuration in 2026 is 5.1.2 or 7.1.4 Dolby Atmos. Both require strict attention to horizontal speaker angles and vertical height channel elevation.
| Speaker Channel | Horizontal Angle from Centre | Recommended Height | Critical Notes |
|---|---|---|---|
| Centre | 0° (directly in front) | Tweeter aligned with display centre or ear level | Carries approximately 70% of dialogue — most critical channel |
| Front Left / Right | 22°–30° from centre | Tweeter at seated ear level | Toe in 10°–15° toward listening position |
| Surround Left / Right (5.1) | 90°–110° from centre | 2–3 ft above seated ear level | Aim directly at listening position |
| Rear Surround (7.1) | 135°–150° from centre | 2–3 ft above seated ear level | Space evenly behind primary listening area |
| Height Channels (Atmos) | 30°–55° elevation from ear level | Ceiling or high upper wall mount | Do not position directly overhead — side-bias improves localisation |
| Subwoofer | Flexible — front wall preferred | Floor level | Corner placement boosts output by up to 6 dB through boundary gain |
Subwoofer placement deserves special attention. Low-frequency sound below 80 Hz is largely omnidirectional, giving considerable flexibility. However, the “subwoofer crawl” method remains the most reliable placement technique: play a 40–80 Hz test tone on repeat, place the subwoofer temporarily at the primary listening position, then physically move through the room to find where bass sounds most even and full. That position is where the subwoofer should live permanently.
Speaker wire gauge matters for any run over 20 feet. Use 16 AWG minimum for runs up to 20 feet and 14 AWG for longer runs. In-wall cable must be rated CL2 or CL3 for fire code compliance. Banana plug terminations reduce oxidation at speaker binding posts and simplify future reconfiguration. In-ceiling Atmos speakers should be placed at 30–45 degrees elevation from the main listening position — not directly overhead, where height cues are more difficult to localise.
How Do You Wire and Connect All Your Home Theater Components?
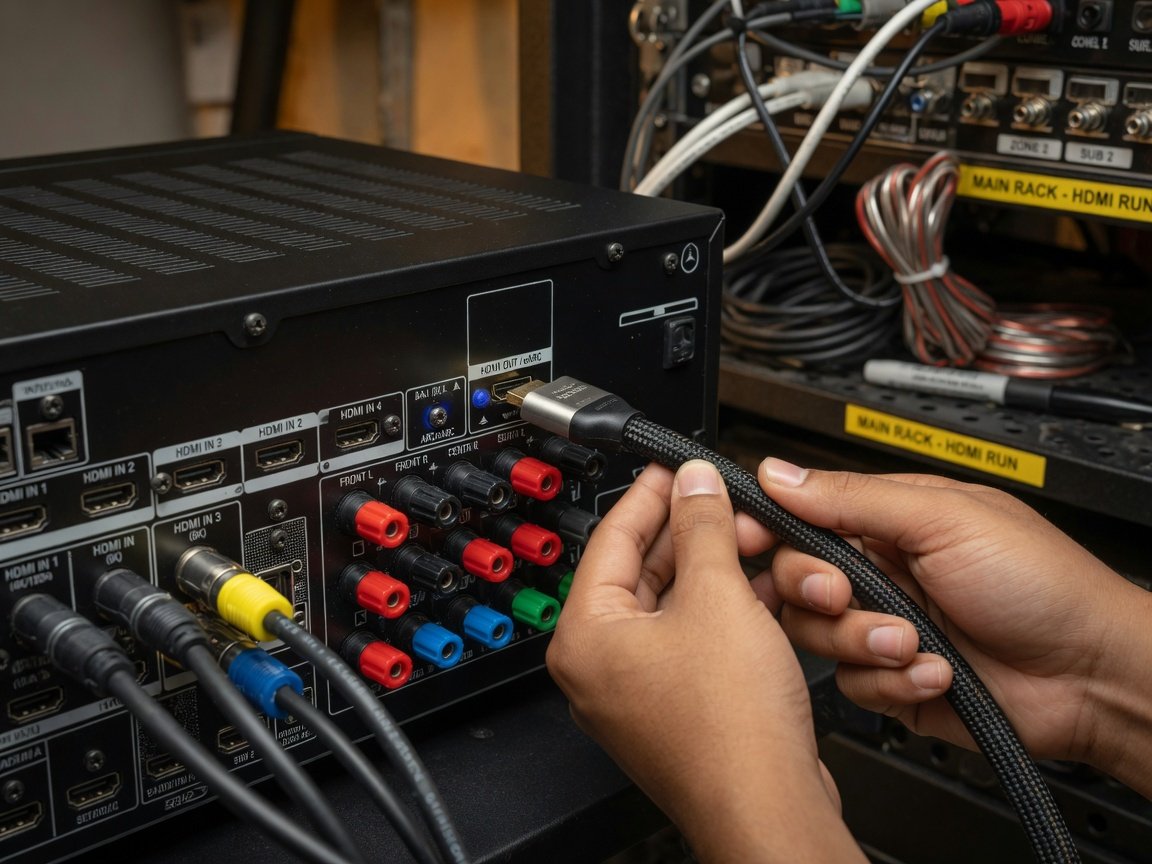
Connection architecture is where most DIY home theater builds go wrong. The correct signal path ensures your AV receiver decodes object-based audio like Dolby Atmos properly, your display receives uncompressed 4K/HDR video, and your system avoids the lip-sync errors that result from incorrect HDMI routing. Follow this sequence precisely — order matters.
Step-by-Step Connection Sequence
HDMI cable bandwidth matters more than most buyers realise. A cable certified for 48 Gbps (Ultra High Speed HDMI, certified by the HDMI Forum with a QR verification code on the packaging) is required for 4K/120Hz or 8K/60Hz pass-through. In 2026, certified Ultra High Speed cables are widely available for under $15 for runs up to 6 feet. For runs over 15 feet, use active HDMI cables or an HDMI-over-fiber solution — passive copper cables degrade reliably at high bandwidth over extended distances.
| Connection Type | Max Bandwidth | Supports Lossless Dolby Atmos | Best Use Case in 2026 |
|---|---|---|---|
| HDMI 2.1 with eARC | 48 Gbps | Yes (TrueHD Atmos) | Primary connection for all modern builds |
| HDMI 2.0 with ARC | 18 Gbps | Lossy only (DD+ Atmos) | Older TVs without eARC support |
| Optical (TOSLINK) | 1.5 Mbps audio only | No — limited to Dolby Digital 5.1 or PCM stereo | Legacy fallback only — avoid for Atmos |
| Coaxial Digital | 1.5 Mbps audio only | No | CD players or legacy source devices only |
| Analog RCA (LFE) | N/A — analog | N/A | Subwoofer LFE connection exclusively |
How Do You Calibrate Your Display for Optimal Picture Quality?
Factory display settings are optimized for retail showroom brightness — not for accurate home viewing. The “Vivid” or “Dynamic” picture modes standard on most TVs push brightness to 600–800 nits with color saturation far beyond the Rec. 709 color space used in virtually all broadcast and streaming content mastering. A calibrated display in “Movie,” “Cinema,” or “Filmmaker Mode” delivers picture quality far closer to what the cinematographer and colorist intended.
Select “Movie,” “Cinema,” or “Filmmaker Mode” as your baseline picture profile. These modes are calibrated to the D65 white point and Rec. 709 color primaries at the factory. Filmmaker Mode additionally disables motion smoothing (the “soap opera effect”), automatic brightness limiting, and other processing modes that alter the director’s timing and contrast intent.
For HDR content, verify your display has the correct format active. HDR10 is universal; Dolby Vision is available on most premium panels; HDR10+ is supported on Samsung and a growing roster of other manufacturers. Set your display to accept full-range RGB (0–255) or YCbCr 4:4:4 from your source at 4K resolution — using limited range (16–235) when full range is expected clips both shadow detail and highlight headroom. Confirm the HDMI Deep Color or Enhanced Format setting is enabled on the specific port your source device uses, or 4K HDR will not pass through correctly.
For professional-grade calibration, a colorimeter paired with calibration software measures and corrects the display’s gamma curve, white balance tracking, and color gamut coverage. Even without hardware tools, using calibration disc test patterns — available on dedicated 4K UHD Blu-ray calibration releases — to set black level, white level, sharpness, and color saturation delivers measurable improvement. A professional ISF calibration from a certified technician typically costs $250–$500 and is the most cost-effective upgrade available for projectors and high-end OLED panels.
How Do You Calibrate Your Audio System for the Best Sound?
Audio calibration transforms a technically correct speaker installation into a genuinely immersive experience. Modern AV receivers include automated room correction systems — Audyssey MultEQ XT32 (Denon and Marantz), YPAO (Yamaha), MCACC (Pioneer), and Dirac Live (NAD, Arcam, Emotiva) — that measure and correct frequency response, inter-channel time alignment, and individual speaker levels using a supplied calibration microphone. These systems represent a fundamental change in what is achievable in an imperfect room.
Run automated calibration as the first step after all speakers are physically positioned. Place the calibration microphone at the primary listening position at seated ear level using a microphone stand — never hold it by hand, as body reflections corrupt the measurements. If your receiver supports multi-position measurement (Audyssey XT32 supports up to eight positions), use every available position for the most accurate room correction solution. Close windows and doors, disable HVAC, and achieve a background noise floor below 30 dB before starting the measurement sequence.
Automated room correction like Dirac Live or Audyssey XT32 can genuinely compensate for room problems that previously required thousands in acoustic panels to address — even systems in rooms with bare parallel walls can sound remarkably coherent after calibration.
After automated calibration, verify the crossover frequency. For most bookshelf and satellite speakers, set the crossover to 80 Hz — the THX and Dolby reference standard — meaning all content below 80 Hz is redirected to the subwoofer. Set all surround and height channels to “Small” in the receiver configuration regardless of their physical size, unless they are genuinely full-range floorstanding speakers rated below 40 Hz. This ensures the subwoofer handles all low-frequency content and prevents midrange drivers from being overdriven by bass material they were not designed to reproduce.
Verify speaker output levels manually using an SPL meter set to C-weighting and slow response. The THX reference level sets each channel to 75 dB SPL at the primary listening position using the receiver’s internal pink noise generator. Adjust individual speaker trim levels until each channel measures 75 dB. This reference calibration ensures dialogue, effects, and music are balanced as the mix engineer heard them.
How Do You Configure Streaming and Smart Home Integration?
In 2026, the home theater is no longer a standalone AV island. It integrates with smart home ecosystems, voice assistant platforms, and multi-room audio networks. Configuring this layer correctly eliminates the single most common frustration in modern home theater ownership: a system that requires multiple remote controls and a manual to initiate a viewing session.
HDMI-CEC is the foundation of simplified one-remote control. When properly configured, CEC allows a single remote — typically the TV remote — to manage power and volume across all connected HDMI devices simultaneously. Enable CEC on every device in the chain: the TV (labelled “Simplink” on LG, “Anynet+” on Samsung, “Bravia Sync” on Sony), the AV receiver, and each source device.
For 4K HDR streaming, verify your streaming device or TV app supports lossless Dolby Atmos output via eARC. Netflix, Disney+, Apple TV+, and Amazon Prime Video all deliver Dolby Atmos content in 2026 — but correct delivery requires an eARC connection to your receiver. Without eARC, these apps output compressed Dolby Digital Plus Atmos rather than TrueHD Atmos. The difference in immersive height channel performance between these two formats is audible on any competent speaker system with a properly positioned Atmos configuration.
Smart home integration via Google Home, Amazon Alexa, or Apple HomeKit adds voice control for power, input switching, and volume. Most 2026-era AV receivers and smart TVs support at least two of these three ecosystems natively. For advanced automation, platforms like Control4 and Savant provide professional macro programming — a single button press can dim lights, close blinds, select the correct HDMI input, set receiver volume, and begin playback. Comparable functionality is achievable with Lutron Caseta lighting and a programmable universal remote at roughly one-fifth the cost of a full automation installation.
What Are the Most Common Home Theater Setup Mistakes to Avoid?
Even technically informed builders make predictable errors that compromise the final system. These are the issues most frequently identified by AV installation professionals during diagnosis calls in 2026 — and every one of them is preventable at the initial build stage.
- Mounting the TV above the fireplace: Heat degrades panel components over time, and the elevation forces a neck-straining upward viewing angle.
- Ignoring speaker polarity: A single reversed polarity connection at any terminal causes phase cancellation that hollows out midrange and collapses bass impact. Verify polarity at every binding post during installation — before running any cables inside walls.
- Setting all speakers to “Large” in the receiver: This routes low-frequency content to drivers not designed to reproduce it, causing distortion and masking subwoofer integration. Set all non-subwoofer speakers to “Small” unless they are full-range floorstanders rated to 40 Hz or below.
- Skipping recalibration after repositioning: Any change to speaker position — even a few inches — invalidates the previous room correction measurements. Always re-run automated calibration after moving any speaker, including the subwoofer.
- Overloading a shared circuit: A high-power AV system can draw 1,500–2,000 watts at peak output. Running this alongside other household loads on a shared 15-amp circuit invites breaker trips and injects power-line noise into sensitive analog audio stages. Dedicate a 20-amp circuit to the home theater wherever the panel configuration allows.
What Home Theater Trends Define 2026 and 2027?
The home theater landscape is evolving in three directions simultaneously. Understanding these trajectories in 2026 helps future-proof a build and avoids investing in connection standards or speaker configurations that become bottlenecks within two years.
AI-assisted calibration is maturing from a marketing feature into a genuine performance differentiator. In 2026, flagship displays use machine-learning upscaling to render 1080p and 4K content approaching native 8K visual resolution. More significantly, on-device AI calibration apps — using a TV’s built-in camera or microphone as measurement tools — are beginning to close the gap between self-calibrated and professionally calibrated setups.
Spatial audio is expanding beyond Dolby Atmos and DTS:X. Auro-3D, MPEG-H Audio, and Sony 360 Reality Audio are entering the mainstream in 2026 as AV receiver manufacturers include multi-format spatial decoding in mid-range products — a capability that required a flagship receiver only three years ago. Plan any 2026 build to support a minimum 7.2.4 channel configuration to accommodate current and near-future spatial audio format requirements without requiring hardware replacement.
Wireless speaker ecosystems are closing the performance gap with wired installations. Wi-Fi 7-based wireless rear and height speakers are achieving latency figures below 10 milliseconds — low enough for audio-visual synchronisation in a cinema content context. By 2027, analysts expect wireless Atmos configurations to be the dominant installation choice in rooms where cable routing is structurally impractical. For new 2026 builds, running conduit now — even while using wired speakers initially — eliminates future retrofit work and preserves all upgrade pathways at minimal current cost.
Frequently Asked Questions About Setting Up a Home Theater System
What is the minimum room size for a home theater system?
A functional home theater can be installed in a room as small as 10 feet × 12 feet, accommodating a 65-inch display and a basic 5.1 configuration. However, rooms below 12 feet × 14 feet face significant limitations in subwoofer bass response and surround sound channel separation. A minimum of 12 feet × 16 feet is recommended for a proper 5.1 or 7.1 setup with comfortable viewing geometry and adequate speaker spacing.
Do I need a dedicated AV receiver, or can I use a soundbar?
A soundbar is a valid choice for living room convenience but cannot replicate true discrete surround sound. A soundbar uses psychoacoustic processing to virtualise surround effects from a front-facing enclosure. A dedicated AV receiver with individually positioned speakers creates a genuine multi-directional sound field because each speaker occupies its geometrically prescribed angle. For a true home theater experience — particularly with Dolby Atmos height channels — a receiver-based system is the technically correct choice.
How important is room acoustic treatment for a home theater?
Acoustic treatment is critically important and consistently underestimated. Hard parallel surfaces create flutter echo and comb filtering that degrade dialogue intelligibility and stereo imaging regardless of speaker quality. First-reflection-point absorption — treating the side walls and ceiling at the geometric midpoint between each speaker and the listening position — delivers measurable improvement in clarity and imaging. Budget approximately 10–15% of your total system cost for acoustic treatment in any dedicated room build.
What is HDMI eARC and why does it matter for Dolby Atmos?
HDMI eARC (Enhanced Audio Return Channel) is a feature of HDMI 2.1 that allows high-bandwidth lossless audio data to travel from your TV back to your AV receiver on the same cable used for video. This is critical because streaming apps run on the TV itself. Without eARC, the TV sends only Dolby Digital Plus — a compressed Atmos format. With eARC, the TV sends Dolby TrueHD Atmos — the lossless format identical to what is encoded on 4K UHD Blu-ray discs. The difference in height channel resolution and dynamic range is clearly audible on any competent speaker system.
Should I buy a projector or a large-screen TV for my home theater?
A projector delivers a larger image for the same expenditure at screen sizes above 100 inches, but requires a dedicated dark room for best HDR performance. A large-format TV at 75–98 inches offers higher peak brightness (800–2,000 nits on OLED and QLED panels), excellent HDR performance in moderate ambient light, and no lamp or laser replacement costs. For rooms without full light control, a 77–85 inch OLED or QLED TV is the better overall choice. For dedicated dark rooms targeting 100 inches or larger, a 4K laser projector delivers the most cinematic experience per dollar in 2026.
What is the correct crossover frequency for a home theater subwoofer?
The THX and Dolby reference standard sets the subwoofer crossover at 80 Hz. This means all content below 80 Hz is redirected to the subwoofer. For large floorstanding speakers with bass extension rated to 40 Hz or lower, a crossover of 60 Hz may be appropriate. For compact bookshelf or satellite speakers, 80–100 Hz ensures the subwoofer handles all low-frequency content those speakers cannot accurately reproduce, preventing driver distortion and improving overall dynamic headroom.
How long does it take to set up a home theater system from scratch?
A complete home theater setup — including unpacking, speaker placement, all wiring, automated room correction calibration, and display calibration — takes 6–12 hours for a first-time installer following a structured guide. Professional installation teams complete the same scope in 3–5 hours. The calibration phase accounts for approximately 25–30% of total setup time and should not be compressed — rushed calibration is the leading cause of poor-performing systems that otherwise have excellent hardware.
Your Home Theater Setup: Implementation Timeline and Next Steps
The home theater systems that deliver exceptional results in 2026 are not defined by budget size — they are defined by installation precision. A mid-range system built and calibrated to the standards in this guide outperforms a high-end system installed carelessly. Start with the room, work through the signal chain methodically, and let calibration complete the work that hardware alone cannot. Follow this sequence to move from planning to a fully operational, calibrated system without rework.
- Week 1 — Room preparation: Measure room dimensions, calculate room modes using an online calculator, plan precise speaker positions against ITU-R angles, identify cable routing paths, and finalise equipment selection. Order all components simultaneously to avoid installation delays.
- Week 2 — Physical installation: Mount display at correct eye-level height, install speaker stands or wall mounts, run speaker cable and HDMI routing. Install at minimum four acoustic panels at first reflection points before first listening session.
- Week 3 — Connection and configuration: Connect all HDMI and speaker wiring following the six-step sequence above. Enable CEC and eARC on all devices. Configure smart home integrations and verify the Atmos delivery chain from each source.
- Week 4 — Calibration: Run automated room correction using all available microphone positions. Verify individual speaker levels with a C-weighted SPL meter against the 75 dB reference. Calibrate display to Filmmaker Mode and verify HDR format detection on each source port.
- Month 2 onward — Refinement: Add corner bass trapping if subwoofer response remains uneven below 60 Hz. Evaluate Atmos height channel performance and adjust elevation angle if needed. Consider professional ISF display calibration for projector-based or premium OLED installations.
For extended guidance on specific component selection, room configurations, and advanced calibration techniques, the full technical library at hometheaterinfoline.com covers every scenario in the same depth and rigour applied throughout this guide.