A home theater built without a plan is an expensive experiment in disappointment. When every component — screen, speakers, acoustics, seating, and lighting — is selected as part of an integrated home theater design strategy, the result is a room that outperforms a commercial cinema in every measurable dimension. This guide, developed by hometheaterinfoline.com, delivers the complete technical framework for designing, specifying, and building a high-performance dedicated home theater from the ground up in 2026 — covering room selection through final calibration.
Executive Summary
- Industry data shows fewer than 12% of self-described home theaters satisfy THX residential standards for viewing angle, seat-to-screen distance, and ambient noise floor simultaneously — a gap that a design-first methodology closes systematically.
- The 2026 display landscape has reached functional parity between 4K laser projection and direct-view LED panels for screens above 110 inches; room geometry and ambient light environment now determine the correct choice more than raw image quality metrics.
- Professionally installed dedicated home theaters in 2026 range from approximately $25,000 for an entry-level designed room to $150,000 and above for flagship installations.
- Design-led projects require fewer on-site change orders than ad-hoc equipment-first builds, because conflicts between architecture, acoustics, and signal infrastructure are resolved during specification — not after walls are sealed.
What Does “Home Theater by Design” Actually Mean?
The phrase “home theater by design” describes a systematic, specification-driven methodology where every element of the room is engineered as an integrated system rather than assembled from independent purchasing decisions. It distinguishes purpose-built, performance-engineered rooms from the far more common practice of placing consumer electronics in an existing living space and categorizing the result as a theater. The distinction is not semantic — it has direct, measurable consequences for acoustic performance, image quality, and long-term system reliability.
The framework encompasses six interdependent subsystems: room geometry and isolation, acoustic treatment, display and projection, speaker placement and calibration, seating and sightline engineering, and environmental control. Each subsystem influences the others in ways that are easy to overlook when components are selected in isolation. A projector chosen without analyzing the room’s ambient light environment will be consistently underpowered. Speaker positions determined without room acoustic modeling will generate comb filtering artifacts at primary seats. Seating arranged without applying THX or SMPTE sightline geometry will deliver inconsistent viewing experience between rows. The design-first framework enforces the correct sequencing: room geometry is analyzed first, acoustic modeling precedes display selection, and control system infrastructure is integrated into the electrical plan during construction rather than retrofitted afterward.
The vast majority of homeowners who self-identify as having a dedicated home theater inhabit a room that does not simultaneously satisfy minimum THX residential cinema specifications for viewing angle, ambient noise floor, and screen-to-seat distance. The performance gap between perceived and actual quality is almost entirely attributable to the absence of coordinated design. This gap also has real budget implications: design-led home theater projects typically require fewer on-site change orders than ad-hoc builds, because architectural and specification conflicts surface on paper during the design phase rather than mid-installation when reversal costs are highest.
How Do You Select the Right Room for a Dedicated Home Theater?
Room selection is the single most consequential — and most frequently under-analyzed — decision in any home theater by design project. The physics of low-frequency sound reproduction mean that specific room dimensions inherently generate problematic resonances called room modes or standing waves. These modes create seat-to-seat bass level variations that electronics alone cannot fully correct. Choosing a geometrically incompatible room sets an acoustic ceiling that no amount of downstream investment can overcome — it is the most expensive mistake in home theater construction.
SMPTE standards for motion picture screening rooms specify a minimum room volume of approximately 1,500 cubic feet and a ceiling height of no less than 9 feet to allow adequate low-frequency dispersion and proper speaker placement geometry. For residential applications, the most widely referenced dimensional guidance comes from the Bolt criterion, which identifies favorable height-to-width-to-length ratios: approximately 1:1.25:1.6 or 1:1.6:2.5. These proportions distribute the frequencies at which room modes occur more evenly across the spectrum, avoiding the severe bass buildup that occurs when modes at multiple frequencies stack at the same spatial locations — a condition that degrades bass clarity and makes digital correction far more aggressive and audible.
Basement spaces are the most commonly chosen location for dedicated home theater installations in North America. The rationale is straightforward: below-grade rooms benefit from earth mass loading on exterior walls (providing broadband sound isolation at no incremental cost), are removed from mechanical noise sources, and allow concrete slab construction that inherently resists impact noise transmission from occupied floors above. When a below-grade room is unavailable, room-within-a-room double-leaf wall construction — two structurally decoupled wall leafs separated by an air gap, sealed with acoustic sealant at all penetrations — can achieve comparable isolation in above-grade spaces, though at significantly higher construction cost. The STC (Sound Transmission Class) target for a properly isolated home theater is STC 60 or above; standard 4-inch stud residential construction achieves approximately STC 34.
What Acoustic Design Principles Must Drive Every Home Theater Build?
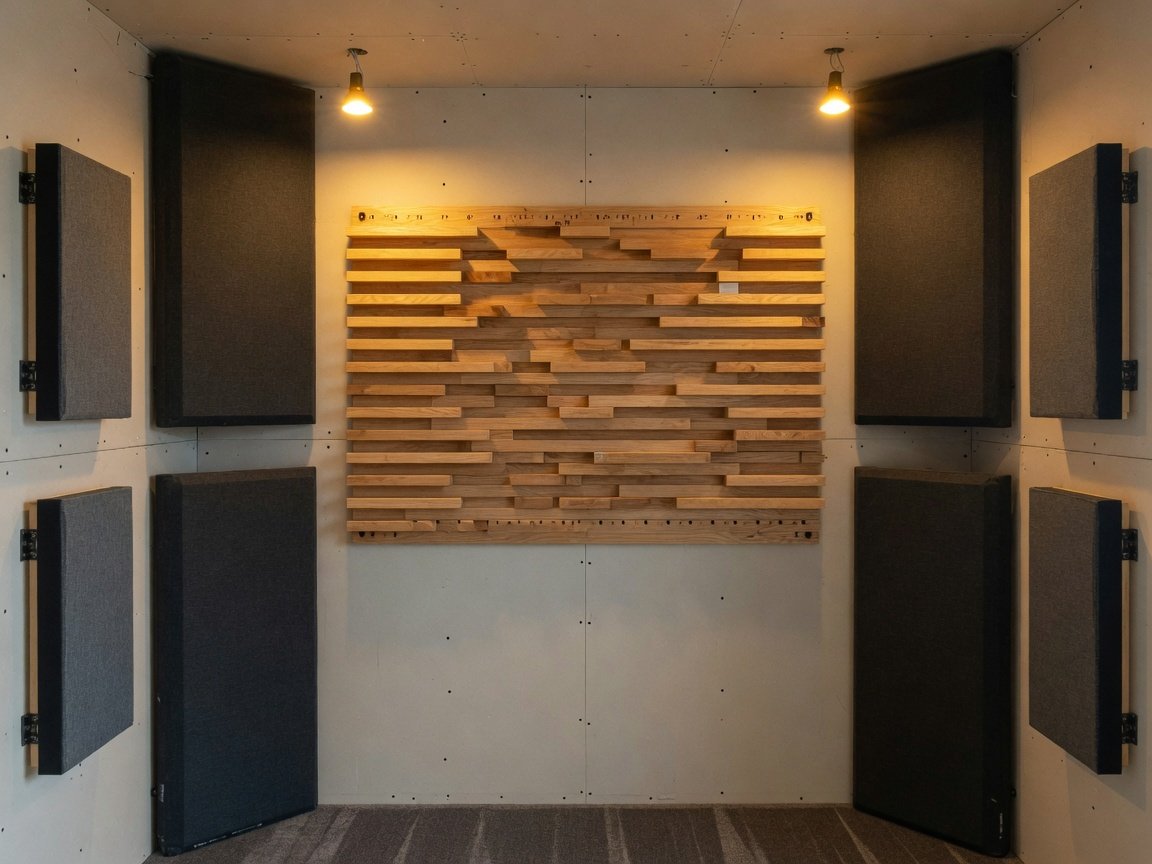
Acoustic treatment in a home theater by design is not decorative paneling — it is structural engineering applied to sound behavior. The technical objective is a controlled room response that matches professional monitoring standards, specifically targeting an RT60 (the time for sound energy to decay by 60 dB after the source stops) of between 0.25 and 0.45 seconds across the critical 500 Hz to 4 kHz speech intelligibility band, as defined by ITU-R BS.1116 for critical listening in small rooms. An RT60 above 0.5 seconds at mid-frequencies produces audible reverb smear that degrades dialogue intelligibility. An RT60 below 0.2 seconds produces an unnaturally anechoic character that exhausts listeners during extended sessions.
Bass management is the most technically demanding element of home theater acoustic design. Below approximately 300 Hz, acoustic wavelengths become sufficiently long — 3.8 feet and above — to establish standing wave patterns that create large position-dependent bass level variations within the room. Untreated residential rooms typically exhibit severe seat-to-seat bass level variation, with differences of 15 dB or more between pressure peaks and nulls at low frequencies. A seat near a bass pressure maximum may reproduce 100 Hz at a significantly louder level than a seat at a pressure null — a difference that renders a single equalization curve useless. Proper treatment combines three complementary strategies: corner-loaded broadband bass trapping using 12–18 inch mineral wool fills at all vertical room edges (where pressure modes are highest); multi-subwoofer placement to distribute modal excitation more evenly; and digital room correction systems (Dirac Live Full or Audyssey MultEQ XT32) to apply residual equalization after physical treatment has reduced the magnitude of deviations to a correctable range.
High-frequency treatment targets first and second lateral reflection points — the side wall positions at the midpoint of the speaker-to-listener propagation path — using absorptive panels of 2–4 inch rigid fiberglass (typically 703 or 705 grade) or rockwool at 6–8 pounds per cubic foot density, mounted in frames with an air gap behind the panel to increase low-frequency effectiveness. The rear wall behind the primary seating position is addressed with a combination of absorption and diffusion: a QRD (quadratic residue diffuser) or Skyline diffuser positioned at the reflection point preserves spatial information from the surround sound field while preventing discrete rear echoes. The front wall — the area surrounding the screen — is treated with near-total absorption to minimize reflections off the room boundary behind the speaker plane and to reduce visual distraction during projection.
How Do You Choose Between Projector and Direct-View LED Display in 2026?
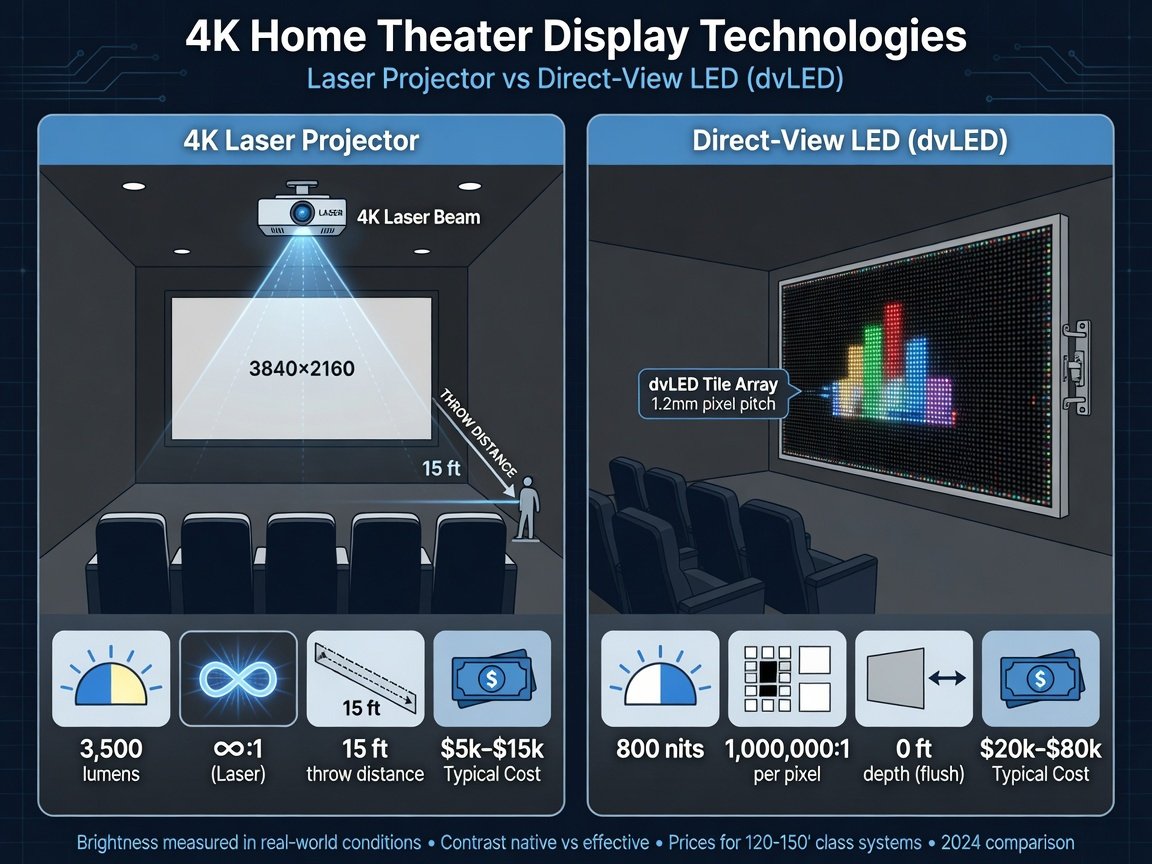
The 2026 home theater display landscape presents two architecturally distinct pathways: large-format laser projection and direct-view LED (dvLED) panel systems. Both technologies have matured to a level where raw image quality differences in controlled conditions are marginal — the practical decision between them is now driven by room geometry, ambient light management capability, and budget allocation rather than a fundamental performance hierarchy. Each technology has a clear envelope within which it outperforms the other, and choosing correctly requires an honest assessment of room conditions rather than brand preference.
4K laser projectors from manufacturers including Sony, JVC, and Epson now deliver native on/off contrast ratios exceeding 20,000:1 in three-chip LCoS configurations, with full laser-off black levels measured in the millions to one — approaching emissive display performance on dark scenes in a light-controlled room. Brightness output ranges from 2,500 lumens for entry-level 4K laser units to 6,000 lumens and above for cinema-grade residential models, which is sufficient to illuminate a 180-inch screen at reference brightness with an appropriate high-gain screen surface. Ultra-short throw (UST) laser projectors — designed for placement 4–12 inches from the screen — have expanded to 120–150 inch screen coverage and are increasingly specified in rooms where projector throw distance is constrained by seating layout or ceiling height. Laser light sources carry rated lifespans of 20,000–30,000 hours at full output, eliminating the $400–$800 lamp replacement cycle of legacy UHP projectors.
Direct-view LED panel systems — assembled from arrays of fine-pitch LED tiles with individual pixel-level illumination control — achieve theoretical infinite contrast ratios because absolute black requires simply turning relevant pixels off rather than attenuating a projection beam. Commercial-grade residential dvLED at 0.9 mm pixel pitch achieves 4K resolution on panel assemblies from approximately 110 inches to well over 200 inches diagonal, specified at 500–1,000 nits peak brightness. This brightness level maintains full perceived contrast under ambient illumination that would make any projection system appear washed out. The principal barrier is cost: a dvLED build delivering equivalent screen real estate and visual quality to a $12,000 laser projector installation typically requires $35,000–$80,000 in panel hardware alone. However, fine-pitch dvLED pricing has fallen significantly since 2023, and mainstream residential adoption at the $20,000–$40,000 price point is anticipated within the 2026–2027 window.
| Specification | 4K Laser Projector | Direct-View LED (dvLED) |
|---|---|---|
| Screen size range | 80–200+ inches | 85–220+ inches (modular) |
| Native contrast ratio | 10,000:1–20,000:1 (laser-on); 1,000,000:1+ (laser-off) | Effectively infinite (per-pixel off) |
| Peak brightness | 2,500–6,000 lumens | 500–1,000 nits (≈1,700–3,400 lumens equivalent) |
| Ambient light tolerance | Low (requires near-total blackout) | High (operates in ambient light) |
| Required throw depth | 10–18 ft (standard); 4–12 inches (UST) | Wall-mount; near-zero depth |
| Lifespan | 20,000–30,000 hours | 50,000–100,000 hours |
| 2026 entry cost (110-inch build) | $4,000–$15,000 (projector + screen) | $18,000–$50,000 (panel assembly) |
| Calibration standard | ISF / CalMAN (D65, ST.2084 EOTF) | ISF / CalMAN (D65, ST.2084 EOTF) |
| Best application | Dedicated, light-controlled rooms, large screens | Rooms with ambient light; premium installations |
What Speaker Configuration Should a Designed Home Theater Specify?
Dolby Atmos and DTS:X object-based audio formats have fundamentally restructured speaker layout specifications for home theater by design in 2026. Rather than assigning audio to fixed channels, these formats define a three-dimensional sound sphere with discrete horizontal, surround, and overhead layers, and Dolby’s reference cinema placement guidelines define angular tolerances from the primary listening position that must be observed for correct audio object localization and smooth panning. These are engineering specifications, not suggestions — deviating beyond the stated tolerances causes objects to “jump” between speaker positions rather than smoothly traversing the intended arc.
Dolby’s residential Atmos specifications define the following placement angles from the primary seat: front left and right at ±30 degrees (±5 degree tolerance), center channel at 0 degrees on screen-center, side surround channels at ±110 degrees (±10 degree tolerance), rear surround channels at ±150 degrees, and Atmos height channels at 30–55 degrees of vertical elevation. THX Ultra2 certification adds a stipulation that side surround channels must not be placed more than 2 feet forward of the primary seating row, which prevents early reflections off side walls from degrading the surround diffusion field. A minimum 7.1.4 configuration — seven horizontal channels, one subwoofer, four ceiling or height speakers — represents the professional baseline for a dedicated home theater in 2026. Rooms exceeding 20 feet in depth benefit from 9.1.6 or 11.1.8 layouts that add front-wide channels (±60 degrees) and additional height layers.
Subwoofer configuration in a designed home theater almost universally employs a minimum dual-subwoofer arrangement. Properly positioned dual-subwoofer arrays — typically placed at opposite ends of the front wall, or at diagonally opposite room corners — substantially reduce seat-to-seat bass variation relative to single-subwoofer placement in residential room geometries. This is the single highest-impact acoustic improvement available in a home theater build relative to its cost, and it should be specified before any other acoustic treatment decision is finalized. The two subwoofers must be identical units driven from a common amplifier channel or with matched level and phase alignment to function as a single distributed source rather than two competing point sources.
How Do You Design Home Theater Seating, Sightlines, and Riser Geometry?
Seating placement in a home theater by design is governed by geometric constraints before comfort preferences. The controlling variable is viewing distance relative to screen width. THX specifies a reference viewing angle of 36 degrees for the primary seat — the horizontal angle subtended by the full width of the screen from the primary listening position. SMPTE 196M establishes 30 degrees as the minimum acceptable viewing angle for any seat in the theater. These standards translate to precise physical distances: a 120-inch diagonal (16:9) screen measures approximately 104.5 inches wide. To satisfy the THX reference standard, the primary seat must be placed at 13.3 feet from the screen face. To satisfy the SMPTE minimum, the furthest permissible seat depth is 16.6 feet. These distances are calculated from screen face to eye position, not to the wall behind the screen.
Multi-row theaters require riser design to preserve sightlines from rear positions. Industry standard practice positions the front riser edge at 6–8 feet from the screen wall, with a riser height of 12–18 inches. This elevation provides clearance above the headrest of a seated front-row viewer — whose eye position is typically 44–48 inches above the finished floor — for a rear-row viewer whose eyes are at an equivalent height but elevated by the riser. In rooms deeper than 20 feet, a second riser is almost always required to maintain the SMPTE sightline standard, which specifies that the top of the screen must remain above the horizontal sightline of every occupied seat when a viewer in the row directly ahead is seated upright at normal posture. Each riser increment of 14–16 inches achieves this clearance for standard theater seating with headrest heights of 42–46 inches.
The acoustic contribution of seating is frequently omitted from room models and can cause post-installation calibration problems. High-backed, heavily padded theater chairs introduce significant mid-frequency absorption — typically an absorption coefficient of 0.55–0.80 at 1 kHz per occupied seat, and 0.35–0.55 per unoccupied seat with padding. A room calibrated with eight occupied seats that is subsequently reconfigured to four will exhibit a measurably different RT60 at mid-frequencies and may require re-measurement and re-application of digital correction to maintain reference performance. Both occupied and unoccupied absorption values should be included in the acoustic model during design, and the calibration should be verified under the room’s primary operational state — typically a partially filled configuration representing average use, not the maximum capacity edge case.
What Lighting Design Principles Apply to a Dedicated Home Theater?
Home theater lighting is engineered around three distinct operational states: pre-show (entry, menu navigation, and setup), active playback, and post-show (intermission and exit). Each state demands a fundamentally different illumination profile, which is why dedicated theaters specify DMX-controlled or Lutron/Crestron/Control4-integrated dimming architectures rather than standard residential switching circuits. Scene presets — typically labeled “Arrival,” “Movie,” “Intermission,” and “Credits” — execute multi-zone dimming curves and transition times automatically, removing the need for manual adjustment and ensuring that playback always begins under reference conditions.
During projected content, the Imaging Science Foundation (ISF) recommends ambient illumination below 0.5 foot-candles (5.4 lux) in a projection theater to prevent stray light from washing the screen surface and reducing perceived contrast. This level is achievable using only floor-perimeter aisle LED strip lighting at 5–10% intensity, which satisfies building code requirements for egress illumination during assembly occupancy without contributing measurably to screen spill. Direct-view LED installations, whose superior ambient contrast performance is a core design argument, permit slightly higher ambient illumination during playback — up to approximately 2 foot-candles (21.5 lux) — while maintaining the perceptual advantages of pixel-level dimming. However, reference viewing in a dvLED room still targets maximum darkness for calibration verification and critical content.
Bias lighting — continuous-spectrum LED strips mounted to the rear surface of the display frame or screen perimeter, projecting light onto the wall behind the screen — is a technically significant element that many installations omit or under-specify. Calibrated bias lighting at D65 color temperature (6500K) and approximately 10% of peak screen luminance is widely recommended to reduce subjective eye fatigue during extended viewing. The mechanism is straightforward: by elevating the ambient luminance level immediately surrounding the screen, bias lighting prevents the visual system from dark-adapting aggressively to the bright screen perimeter against an otherwise black surround — the visual condition most responsible for eye strain in dark-room viewing environments. ISF and Imaging Science Foundation guidelines specify that bias light color temperature must match the display’s white point calibration target (D65 / 6500K) to avoid introducing color cast at the screen edge; a bias light at 3000K warm white will appear visibly yellow against a D65-calibrated display.
How Do You Specify AV Control and Smart Integration for a Home Theater?
The AV control system is the operational layer that transforms a collection of high-specification components into a functional home theater. It binds display, audio processor, streaming sources, lighting, HVAC setpoints, motorized projector screen, motorized blackout shading, and rack power management into a unified interface that executes complex preset sequences — “Movie,” “Sports,” “Music,” “Intermission” — with a single command. Without a properly integrated control system, operating a multi-component theater requires intimate knowledge of every device’s individual interface, creates frequent user error, and systematically undermines the perceived quality of even the most technically excellent room.
In 2026, the leading enterprise-class residential AV control platforms are Crestron, Control4, and Savant. These systems support IP-based bidirectional device control with authentic two-way feedback — the display’s current input selection and the audio processor’s precise volume level are reflected accurately on the interface in real time, not estimated from the last command issued. They support structured programming environments that allow complex conditional logic (skip the projector warmup sequence if the room is already at operating temperature; dim to 20% at intermission rather than 0% if the secondary “reading” light scene is active) and maintain deep driver libraries for AV, lighting, climate, and security equipment. For projects below the $80,000 total-cost threshold, Josh.ai has established a strong market position by offering on-device natural language AI control without routing audio to external cloud servers — a privacy consideration that has limited cloud-based voice assistant adoption in residential theaters.
Signal distribution architecture must be finalized before conduit is installed, because cable capacity and pathway are determined during rough-in. Systems with cable runs under 25 meters typically use 48 Gbps HDMI 2.1 matrix switchers supporting 4K/120Hz, HDR10+, and Dolby Vision passthrough. Runs exceeding 25 meters require HDBaseT or fiber optic HDMI distribution systems to maintain signal integrity over distance. Critically, HDCP 2.3 compliance must be verified across every device in the signal chain — display, audio processor, switcher, and source — prior to specification. A single HDCP-non-compliant component causes complete authentication failure and prevents 4K HDR content delivery from any streaming service or UHD physical media player. This failure mode is disproportionately expensive to diagnose after cable runs are enclosed, and is entirely preventable through pre-specification compatibility verification with component distributors.
What Is the Step-by-Step Build Process for a Home Theater by Design?
A designed home theater follows a defined build sequence that is non-negotiable in its ordering. Steps that are performed out of sequence — acoustic modeling after equipment specification, conduit installation before the cable schedule is final, calibration before acoustic treatment is complete — generate rework costs that can equal or exceed the savings gained by shortcutting the sequence. The following 15-step process reflects the standard professional workflow for a fully custom dedicated home theater project in 2026.
- Define scope and performance tier: Establish the room’s use case (cinema-only vs. music and gaming), target reference level (85 dB SPL or 105 dB SPL cinema-reference), and budget allocation across acoustic, display, audio, and control categories.
- Commission acoustic measurement and room mode analysis: Use a calibrated measurement microphone (UMIK-1 or equivalent) and Room EQ Wizard (REW) to measure the unmodified room’s modal behavior, RT60 across octave bands, and noise floor (NC rating).
- Develop display geometry specification: Calculate screen size, aspect ratio, throw distance, lens shift requirements, and gain specification based on room dimensions and seating layout. Verify throw ratio against shortlisted projector models.
- Generate speaker placement drawings: Plot all speaker positions against Dolby Atmos, DTS:X, and THX Ultra2 angular standards, verifying that room dimensions allow compliant placement before equipment is ordered.
- Complete the full AV system specification: Finalize the component list, rack elevation drawing, cable schedule (with cable type, length, and connector specification per run), and power requirement worksheet for the electrical contractor.
- Develop the lighting design: Define DMX channel assignments, fixture positions, scene preset definitions, and emergency egress compliance with local building code.
- Submit for permits and contractor bidding: Issue construction drawings for permit review. Circulate specification documents to AV installer, electrician, HVAC contractor, and general contractor for bid preparation.
- Rough-in phase: Install conduit, pull all low-voltage wire runs, mount speaker backer boxes and in-wall speaker rough-in frames, install equipment room plywood backing, and complete HVAC ducting for rack ventilation.
- First-fix AV installation: Mount in-wall and in-ceiling speakers, install display mounting hardware (projector mount, screen rough-in brackets, or dvLED tile-mounting rails), and complete rack furniture installation.
- AV rack build and preliminary programming: Rack all components, complete inter-rack wiring, load firmware on all devices, and perform preliminary system programming and device verification.
- Acoustic treatment installation: Install corner bass traps, first and second reflection absorption panels, rear wall diffusion, and front-wall absorption in the sequence specified by the acoustic model.
- Seating installation and sightline verification: Install riser structure, complete seating installation, and physically verify SMPTE sightline compliance from every seat using a laser level or transit.
- AV calibration: Perform display calibration to ISF/CalMAN standards (D65 white point, 2.2/ST.2084 gamma, P3 or BT.2020 gamut); complete audio processor room correction (Dirac Live or Audyssey MultEQ XT32); verify reference SPL at primary seat with calibrated SPL meter.
- Control system commissioning: Complete scene programming, macro logic, two-way device feedback verification, and user interface configuration across all control points (touch panel, mobile app, voice).
- Final walkthrough and handover: Conduct client training session covering daily operation and common scenarios; deliver as-built documentation, equipment serial numbers, and calibration records.
How Much Does a Home Theater by Design Cost in 2026?
Budget calibration is one of the most requested outputs from any home theater by design consultation. A fully designed, acoustically treated, and professionally calibrated dedicated home theater in 2026 typically falls within the $40,000–$120,000 range, depending on specification tier and room complexity. Labor typically accounts for 25–35% of total project cost; acoustic treatment materials represent an additional 8–12% — a line item that is routinely underbudgeted in homeowner-managed projects, often resulting in post-installation acoustic correction costs that exceed what properly specified treatment would have cost at rough-in.
| Tier | Room Volume | Display | Audio Config | Acoustic Treatment | Control System | Budget Range |
|---|---|---|---|---|---|---|
| Entry | 1,500–1,800 cu ft | 4K Laser Projector (entry) | 7.1.4 in-wall/bookshelf | Panel and corner trap | Josh.ai / Control4 Lite | $25,000–$50,000 |
| Mid | 1,800–2,400 cu ft | 4K Laser Projector (premium) | 7.1.4 dedicated tower/in-wall mains | Full-room treatment | Control4 / Savant standard | $50,000–$90,000 |
| Premium | 2,400–3,500 cu ft | 4K/8K Laser or entry dvLED | 9.1.6 flagship components | Full treatment + structural isolation | Crestron / Control4 advanced | $90,000–$150,000 |
| Flagship | 3,500+ cu ft | Cinema-grade dvLED or laser | 11.1.8 studio-class | Full isolation, custom bass trap design | Crestron enterprise | $150,000–$500,000+ |
The budget ranges above cover the dedicated theater room and its direct AV, acoustic, and control systems. They do not include structural alterations to create the room (framing, drywall, flooring, HVAC — which can add $15,000–$60,000 for a new basement build-out), furniture beyond theater seating, or the equipment room / AV closet buildout. A realistic total-project budget for a custom mid-tier theater including room construction, AV specification, equipment supply, acoustic treatment, installation, and calibration typically sits between $85,000 and $130,000 for a 2,000 square foot home in a major U.S. or U.K. metropolitan market in 2026.
What 2026–2027 Trends Are Reshaping Home Theater by Design?
The home theater design landscape is undergoing the most significant technology transition in a decade, driven by convergence in display technology pricing, AI-augmented room correction, and the maturation of spatial audio beyond cinema content. Designers specifying rooms for completion in late 2026 and 2027 need to account for these shifts in both equipment recommendations and infrastructure planning — particularly HDMI backbone capacity, which is difficult and expensive to upgrade after rough-in.
- AI-adaptive room correction: Dirac Live 3.0 and next-generation Audyssey implementations are incorporating machine-learning algorithms that dynamically adjust compensation curves per seat rather than applying a single averaged correction. In practice this means a 9-seat theater can deliver optimized frequency response at every position simultaneously — a capability that was previously achievable only with dedicated DSP per seating zone.
- dvLED commoditization: Fine-pitch LED pixel pitch is declining toward 0.6 mm at sub-$20,000 price points for 110-inch assemblies by late 2026, with modular panel systems from commercial display manufacturers reducing installation complexity. Within the 2026–2027 cycle, dvLED is expected to become a mainstream mid-tier specification rather than a premium differentiator.
- 8K infrastructure specification: While 8K content delivery via streaming remains limited, specifying 48 Gbps HDMI 2.1 infrastructure throughout the signal chain is now standard practice in new builds. Rooms with screens above 130 inches and primary seating within 12 feet will benefit perceptually from 8K resolution; rooms with standard viewing distances will not, but the infrastructure cost is negligible relative to total project budget.
- Spatial audio for music and gaming: Apple Spatial Audio, Sony 360 Reality Audio, and Dolby Atmos Music are driving demand for speaker configurations optimized across all content types — not exclusively cinema. The result is a baseline specification shift toward 9.1.6 even in entry-tier projects, because the additional height channels are required for spatial music formats to perform correctly.
- Electrochromic glazing replacing motorized shading: Smart glass panels with automated light transmission ranging from 1% to 65% on a DMX or IP command are increasingly specified for above-grade rooms with exterior windows, eliminating motorized blackout shade mechanisms and their associated maintenance. Pricing for residential electrochromic glazing has declined significantly since 2024, making it increasingly cost-competitive with premium motorized blind systems.
- Thermal management as a design input: High-density AV racks incorporating 8K media servers, network-attached storage for local movie libraries, and multi-zone amplifiers can generate 3–5 kW of continuous heat output. HVAC engineers are now required to include this thermal load as a design input during new construction rather than treating it as an afterthought — a shift that reflects the increasing equipment density of reference-class home theater builds.
Example Scenario: A Basement Conversion
The following illustrative scenario applies the design principles in this guide to a realistic basement room geometry. The dimensions and specification choices are representative of a mid-range dedicated home theater build; they are not measurements from a specific project.
Illustrative Room Specification
Room: Dedicated basement space, 22 ft × 15 ft × 9.5 ft (3,135 cubic feet). Bolt ratio: 1 : 1.58 : 2.32 — within favorable range. Concrete slab floor, 8-inch poured concrete exterior walls.
Design interventions: Full acoustic specification; broadband corner bass trapping (12-inch mineral wool, floor-to-ceiling, all four vertical room edges); first and second lateral reflection absorption panels (4-inch 703 fiberglass, framed with 1-inch air gap); rear-wall QRD diffuser array (prime 7, 1,000 Hz design frequency); 130-inch 2.35:1 fixed-frame screen (1.2 gain, black velvet border); Sony three-chip LCoS 4K laser projector at 4,000 lumens; 7.1.4 Dolby Atmos speaker layout (THX Ultra2 compliant angular placement); dual 15-inch subwoofers (front wall and rear wall, matched phase); Dirac Live Full room correction; Crestron control integration with four scene presets.
Frequently Asked Questions
What is the minimum room size for a dedicated home theater?
SMPTE standards specify a minimum room volume of approximately 1,500 cubic feet with a ceiling height of at least 9 feet. In practice, rooms smaller than 12 ft × 14 ft at standard ceiling heights struggle to achieve adequate low-frequency performance without extraordinary acoustic intervention. A room of 14 ft × 20 ft at 9 feet (2,520 cubic feet) with favorable dimension ratios represents a comfortable entry point for a fully designed single-row theater.
What is the difference between a media room and a dedicated home theater?
A media room is a multi-purpose space — typically derived from a living room, family room, or open-plan area — with enhanced AV equipment. It is not acoustically controlled, is not light-controlled, and is designed for casual viewing alongside other room functions. A dedicated home theater is a purpose-built, single-use room engineered specifically for reference-quality audio and video reproduction, with controlled acoustics, controlled light, and a specification-driven equipment system. The performance difference between the two is not marginal — it is categorical.
Do I need acoustic treatment even with a high-end sound system?
Yes — unconditionally. High-specification loudspeakers cannot overcome room modes and early reflections, because these are physical phenomena caused by the room’s geometry and boundary conditions, not deficiencies in the transducer. Even a $50,000 speaker system in an untreated room will underperform a correctly specified $8,000 system in a properly treated room at the same seating position. Acoustic treatment addresses the problem at its source; electronics — including digital room correction — can only partially compensate for what treatment should have prevented.
How long does a home theater by design project take from first engagement to handover?
Design and specification typically require 4–8 weeks for a standard dedicated room project, depending on specification complexity and client review cycles. New-build construction — framing, drywall, electrical, and HVAC — adds 8–16 weeks. AV rough-in, equipment installation, acoustic treatment, and calibration require 3–5 additional weeks. Total project duration from initial engagement to client handover typically runs 4–7 months for a fully custom theater. Retrofit projects in existing finished rooms run shorter — typically 8–14 weeks from specification to completion — but carry the constraints of working within fixed dimensions and existing infrastructure.
Is 8K worth specifying in a new home theater build in 2026?
8K display resolution becomes perceptually beneficial at screens above 130 inches with primary seating closer than 12 feet — the distance at which an observer with 20/20 vision can resolve individual pixels on a 4K display. At standard residential seating distances (13–18 feet) on screens below 130 inches, 4K remains the optimal value-for-performance specification. However, specifying 48 Gbps HDMI 2.1 infrastructure throughout the signal chain is recommended in all new builds regardless of current display choice — the incremental infrastructure cost is negligible, and the cable runs cannot be easily replaced after rough-in.
What calibration standard applies to home theater displays?
The Imaging Science Foundation (ISF) certification and CalMAN workflow software define the industry standard for residential display calibration in 2026. Reference calibration targets are D65 white point (6500K correlated color temperature), 2.2 power-law gamma for SDR content, and ST.2084 EOTF (PQ curve) for HDR content. Color space targets are DCI-P3 for projectors and wide-color-gamut direct-view displays, and BT.709 as the secondary profile for standard dynamic range broadcast content. An ISF-calibrated display should achieve an average delta-E (color accuracy deviation from the reference standard) of 2.0 or below across a full P3 gamut sweep — a level at which color errors are perceptually invisible under normal viewing conditions.
Can an existing finished room be retrofitted to perform at a designed-theater level?
Retrofitting is achievable and frequently executed, but it operates under fixed constraints that a new-build design does not. Room dimensions cannot be changed, meaning modal behavior is architecturally determined and must be managed entirely through acoustic treatment and digital correction rather than through favorable geometry. Structural sound isolation — which prevents theater noise from transmitting to adjacent rooms and prevents exterior noise from reaching the theater — is extremely difficult to improve in a finished room without major demolition. The more favorable the existing room dimensions and existing isolation, the closer the retrofit can approach designed-from-scratch performance. The baseline acoustic measurement (REW with calibrated microphone) is the first step for any retrofit project, as it quantifies exactly what the room needs before a single panel is specified or a dollar is spent on equipment.
Conclusion: Your 2026 Home Theater by Design Implementation Sequence
Every high-performance home theater begins with the same realization: the room is the instrument, and every component is secondary to it. The technology available to homeowners in 2026 — laser projection, direct-view LED panels, Dolby Atmos at 11.1.8, AI-driven room correction, natural language control systems — is extraordinary. None of it performs to its specification in a room that has not been designed to receive it. The design-first methodology documented throughout this guide is not a premium service tier for the highest-budget projects; it is the minimum rational approach for any project where performance, not just equipment ownership, is the goal.
The practical implementation sequence for a new home theater by design project in 2026 follows this priority order:
- Months 1–2: Room selection and acoustic measurement. Take baseline measurements in the candidate room using REW and a calibrated microphone. Verify that room dimensions fall within Bolt criterion ratios and that ambient noise floor is at or below NC-38 before construction begins. If dimensions are unfavorable, this is the time to reconsider — not after framing.
- Months 2–3: Full system specification. Complete display geometry, speaker placement drawings, AV component list with HDCP compliance verification, lighting DMX design, and control system architecture. Issue for permit and contractor pricing. Do not begin construction without a complete specification package.
- Months 3–5: Construction and rough-in. Execute framing, electrical, HVAC, conduit, and low-voltage wire pulls to specification. Verify every rough-in dimension before drywall is closed.
- Months 5–6: AV installation and acoustic treatment. Install equipment in the specified sequence — treatment after equipment mounting, calibration after treatment is complete. Never calibrate in an untreated room and then add treatment; the room’s response will change and require full recalibration.
- Month 6–7: Calibration, commissioning, and handover. Perform ISF display calibration, Dirac Live or Audyssey room correction, reference SPL verification, and control system scene programming. Deliver as-built documentation and calibration records to the homeowner.