A successful home theater installation is the product of deliberate planning, precise execution, and disciplined calibration — not simply connecting expensive components together. Whether you are building a dedicated cinema room from scratch or converting a living space, the quality of your home theater setup depends almost entirely on the decisions made before the first cable is run. This guide covers every technical phase of a home theater installation, from initial room evaluation and component selection through speaker positioning, cable management, and final calibration, so your system performs at the highest possible level from day one.
Executive Summary
- Plan before purchasing: Room dimensions, acoustic properties, and viewing geometry determine which components will actually perform well in your specific space — and which will underperform regardless of their price.
- Calibration is the final multiplier: Room correction software in modern AV receivers reduces frequency response anomalies by up to 20 dB at the primary listening position, producing a measurable improvement that most installations skip entirely.
- Process drives outcomes: Following a documented installation sequence consistently produces better results than improvising — room geometry, speaker placement, and calibration all build on earlier steps in ways that are difficult to correct retroactively.
- Infrastructure is a long-term investment: Over-specifying conduit and cable pathways during initial installation eliminates costly retrofits when 8K content delivery and next-generation immersive audio formats require upgraded signal infrastructure.
What Does a Complete Home Theater Installation Actually Involve?
Home theater installation is not a single event — it is a multi-phase technical project that spans room assessment, infrastructure construction, component mounting, electrical planning, signal routing, and acoustical tuning. A full installation comprises at least six discrete phases: site survey and room planning, cable pathway construction, display mounting, speaker positioning and wiring, AV rack assembly, and final calibration. Each phase builds directly on the previous one, which is why skipping the planning stage almost always produces expensive, difficult-to-correct problems after walls are closed and furniture is placed.
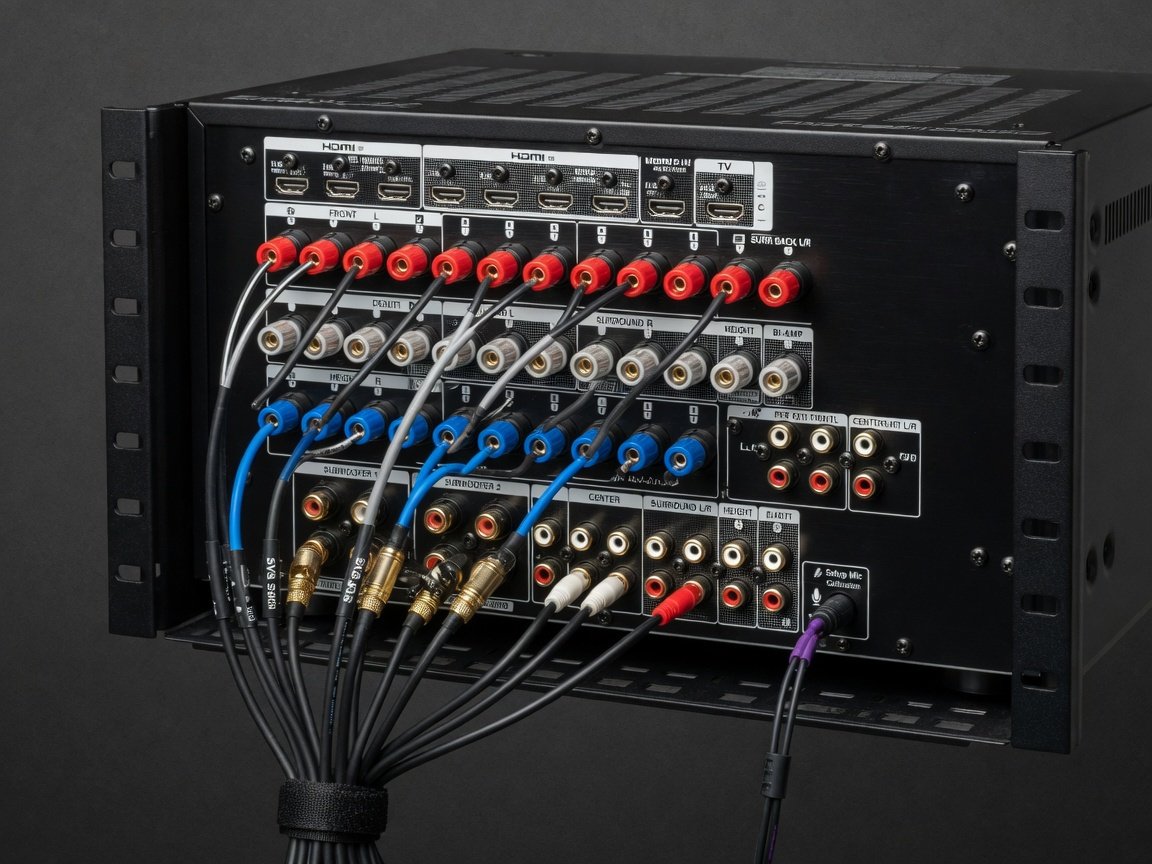
At the systems level, the AV receiver is the technical hub that manages audio decoding, video switching, and signal amplification. Every source device — a 4K Blu-ray player, a streaming media box, a gaming console, a cable or satellite receiver — connects to the AV receiver, which processes and distributes signals to both the display and the speaker array. Understanding this signal architecture before planning begins is essential for selecting the right receiver, specifying adequate cable pathways, and positioning components for optimal connectivity. The single most common mistake in residential home theater installation is treating the AV receiver as an afterthought — the receiver defines the system’s complete capability set, and every other component decision should flow from that specification first.
How Do You Plan the Right Room for a Home Theater Installation?
Room planning is the single highest-leverage activity in any home theater installation. A space with poor dimensional ratios, parallel reflective surfaces, or inadequate acoustic isolation will undermine even the most expensive speaker and receiver combinations. The ideal dedicated theater room follows proportional dimensions that distribute low-frequency standing waves evenly. The Bolt Area, a framework from architectural acoustics research, recommends dimensional ratios such as 1:1.14:1.39 (height:width:length) to avoid the most problematic low-frequency resonance patterns. Practically, a room at least 12 feet wide and 16 feet long provides the minimum distance required for proper surround speaker geometry and adequate bass development at the primary listening seat.
Room characteristics have a profound effect on perceived audio quality — yet many home theater owners significantly underestimate their room’s impact on sound before installation. Parallel walls create flutter echoes and comb filtering that collapse dialogue intelligibility and smear stereo imaging. Hard floors and bare plaster ceilings produce excessive reverberation that muddles transient definition. The target reverberation time for a home theater room is between 0.3 and 0.5 seconds (RT60), achievable through strategic placement of broadband absorption panels at first reflection points, bass traps in all room corners, and a diffuser array on the rear wall. This treatment framework costs less per dollar of improvement than any equivalent source component upgrade.
The room is the biggest component in any home theater. A well-planned system can outperform a carelessly installed one at far greater cost because the acoustics were properly addressed. Acoustic planning is not a luxury add-on — it is the foundation that every component’s performance claim rests on.
How Do You Choose and Size Your Home Theater Display?
Display selection is fundamentally determined by two factors: ambient light control and available viewing distance. In a fully light-controlled dedicated room, a front-projection system with an acoustically transparent screen is the technically superior choice, delivering screen sizes of 100 inches and above at a fraction of the cost of any equivalent flat-panel display. In rooms with ambient light that cannot be fully controlled, a large-format OLED or QLED panel at 85 inches or larger outperforms projection in contrast ratio, shadow detail, and peak brightness. The 2026 market offers 98-inch QLED and 97-inch OLED panels that approach cinema-grade performance in environments where projection is impractical.
THX specifies a minimum horizontal viewing angle of 36 degrees for an engaging presentation, with 40 degrees as the immersive target. For a 120-inch 16:9 screen, this places the optimal viewing distance between 12 and 16 feet from the screen surface. For a 100-inch screen, the optimal range is 10 to 13 feet. As a practical sizing formula: multiply your seating distance in inches by 0.835 to find the minimum diagonal screen size, and by 1.0 for the full immersive target. Oversized screens in constrained spaces cause perceptual fatigue; undersized screens in large rooms forfeit the sense of scale that justifies a dedicated installation in the first place.
| Screen Size (diagonal, 16:9) | Optimal Viewing Distance | Minimum Room Width | Recommended Technology |
|---|---|---|---|
| 85 inches | 8.5 – 11 feet | 12 feet | OLED or QLED flat panel |
| 100 inches | 10 – 13 feet | 13 feet | UST projector or large flat panel |
| 120 inches | 12 – 16 feet | 14 feet | Standard throw projector |
| 150 inches | 15 – 19 feet | 17 feet | Long throw projector |
How Do You Select and Position Home Theater Speakers?
Speaker selection and placement are where most home theater installations succeed or fail acoustically. The ITU-R BS.775-3 standard defines the reference placement geometry for multichannel audio: the center channel is positioned at 0 degrees, left and right mains at 22.5 to 30 degrees off-axis, side surrounds at 90 to 110 degrees, and rear surrounds at 135 to 150 degrees from the primary listening position. Deviating substantially from these angles degrades directional localization accuracy and spatial envelopment in ways that no amount of equalization or signal processing can fully compensate for. Dolby Atmos overhead channels should be angled downward at 30 to 55 degrees of elevation above the primary seat — delivered through dedicated in-ceiling drivers or front-firing height modules mounted atop the main speakers.
Subwoofer placement is among the most consequential — and most frequently mishandled — elements of a home theater installation. Room modes create standing waves that produce bass response variations of 10 to 15 dB across different positions in a typical rectangular room. The subwoofer crawl method remains the industry standard for empirical placement optimization: temporarily position the sub at the primary listening seat, play a sustained low-frequency test tone, and walk the room perimeter listening for the location with the most extended, even bass response. Move the sub to that location permanently, then re-confirm with a measurement microphone. Deploying dual subwoofers symmetrically — at front room corners or at opposing midpoints on side walls — reduces room mode severity and extends consistent bass coverage across multiple seating positions simultaneously.
Which AV Receiver Is Right for Your 2026 Home Theater Installation?
The AV receiver is the technical cornerstone of any home theater installation. In 2026, the minimum specification for a genuinely future-capable receiver includes HDMI 2.1 on all input and output ports, 8K/60Hz and 4K/120Hz video pass-through, eARC (enhanced Audio Return Channel) on the HDMI output feeding the display, Dolby Atmos and DTS:X decoding, and a built-in room correction system with per-channel parametric equalization. HDMI 2.1 delivers 48 Gbps of bandwidth — double the capacity of HDMI 2.0 — enabling uncompressed 4K/120Hz HDR gaming, 8K streaming content delivery, and the variable refresh rate and auto low latency mode features that gaming-integrated home theaters depend on. Any receiver purchased in 2026 without full HDMI 2.1 across all ports is already architecturally constrained before a single component is connected.
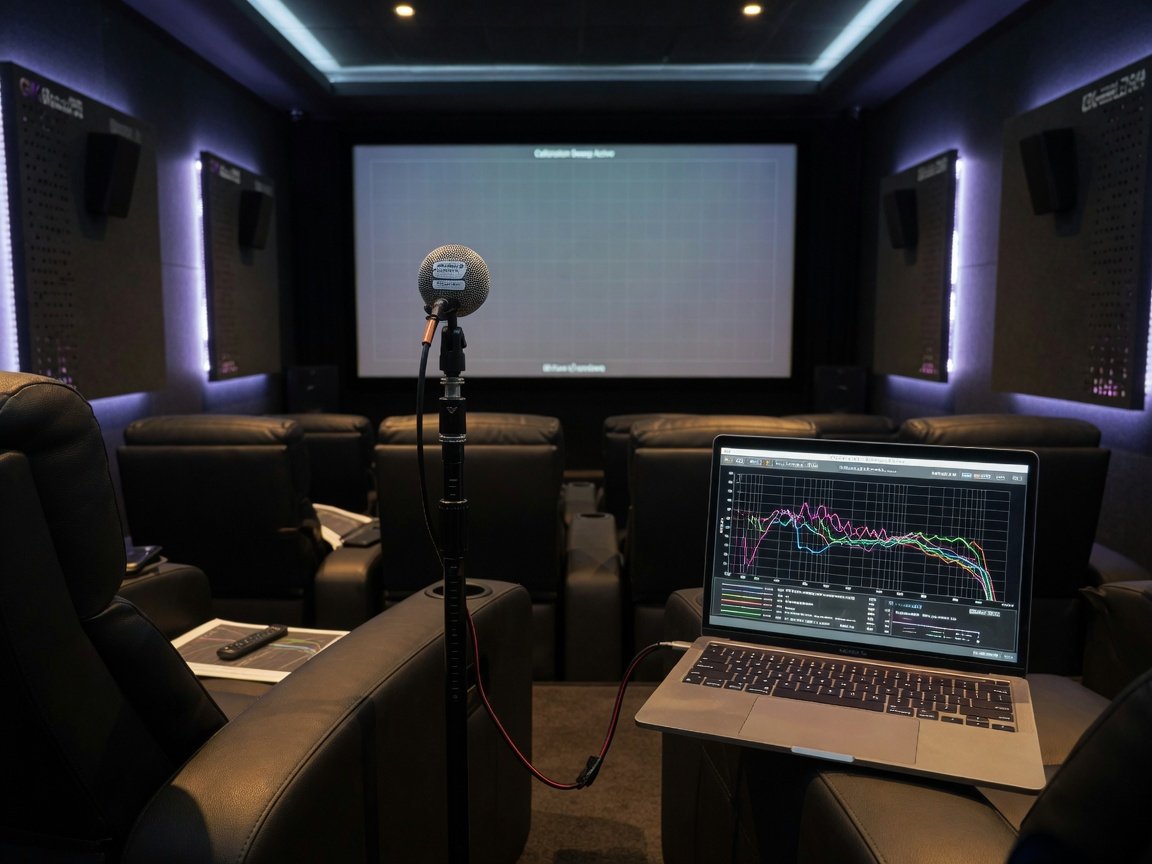
Room correction is the most impactful technical feature in a modern AV receiver. Systems including Audyssey MultEQ XT32, Yamaha YPAO Reflected Sound Control, and Dirac Live Full Bass Control use calibrated measurement microphones to characterize frequency response anomalies at the listening position and apply digital correction filters. Dirac Live has established itself as the 2026 performance benchmark, offering simultaneous frequency and impulse response correction — addressing both tonal imbalances and the time-domain smearing that makes bass notes in untreated rooms sound slow and ill-defined. For channel architecture, a 9.2 or 11.2 receiver provides the flexibility to run a full Dolby Atmos 7.1.4 layout: seven bed-layer channels, two independent subwoofer outputs, and four height channels — the reference home configuration defined by Dolby’s current installation guidelines.
How Do You Route and Manage Home Theater Cables Properly?
Cable management is the invisible infrastructure layer of a home theater installation — imperceptible when executed correctly, and a persistent source of signal degradation and maintenance problems when done poorly. All cable pathways should be planned and physically roughed in before any display mounting, speaker installation, or wall finishing work begins. Use EMT metal conduit or flexible ENT (electrical non-metallic tubing) for all in-wall runs to allow future cable replacement without opening finished walls. HDMI 2.1 cables carrying 48 Gbps signals are highly sensitive to conductor quality and run length: for runs exceeding 10 feet, active optical HDMI cables eliminate signal degradation, bandwidth roll-off, and HDCP handshake failures that passive copper cables introduce over distance.
Speaker wire gauge must be matched to both run length and speaker impedance. For runs under 50 feet feeding 8-ohm speakers, 16 AWG copper wire is technically adequate. Runs exceeding 50 feet require 12 or 14 AWG to keep resistance-induced power loss below the audible threshold. All subwoofer connections use shielded RCA or XLR cable regardless of run length — unshielded lines over long distances function as antenna elements for ambient electromagnetic interference. The most critical cable management principle is physical separation: route all low-voltage signal cables (HDMI, analog audio, subwoofer, control) in dedicated conduit separated from speaker wire, and never parallel to AC mains wiring at any point in the run.
How Do You Calibrate Your Home Theater System After Installation?
System calibration is what separates a correctly installed home theater from a genuinely exceptional one. Audio calibration begins with the AV receiver’s built-in room correction utility. Before running any measurement sequence, configure all speakers as “small” in the receiver’s speaker setup — regardless of their physical size or stated bass extension capability. This routes bass below the crossover frequency to the subwoofer: 80 Hz is the Dolby and THX reference crossover default for all channels, and it is the correct starting point for virtually every home theater speaker system. Run the room correction measurement sequence from the primary listening position first, then from two to four secondary seating positions to average out the localized acoustic anomalies that a single-point measurement cannot account for.
Video calibration is equally important and far more frequently neglected. Factory picture modes on virtually all displays are tuned for brightly lit retail showrooms, not darkened home theater environments. Use the “Movie” or “Cinema” picture preset as a starting baseline — this typically applies a more accurate gamma curve (2.2 for standard dynamic range, 2.4 for fully darkened room viewing) and reduces the oversaturated color processing of factory default modes. Set color temperature to “Warm” or 6500K to match the D65 white point standard to which all theatrical and broadcast content is mastered. For reference-level accuracy, a professional ISF-certified hardware calibration — using a spectrophotometer and dedicated calibration software — measures and corrects color error to Delta-E values below 2.0, the threshold below which color difference is imperceptible to the human visual system.
Most installers consider the job complete when the system turns on and produces sound. Calibration is where the real technical work happens — a properly calibrated system sounds categorically different from an uncalibrated one, not subtly better but fundamentally different in spatial accuracy, tonal balance, and dialogue clarity.
What Do Professional Home Theater Installers Recommend?
Professional installers consistently identify three areas where DIY home theater installations underperform: acoustic treatment, cable infrastructure specification, and calibration follow-through. The two most common problems in self-installed home theaters are untreated acoustics and undersized conduit. Both are expensive to fix retroactively, and both are entirely preventable with proper upfront planning. Acoustic panels cost less than a mid-range AV receiver and deliver more audible improvement per dollar than any component upgrade at a comparable price. A basic acoustic treatment package — corner bass traps, first-reflection panels, and a rear-wall diffuser — ranges from $400 to $1,500 depending on room size and panel construction.
Professional practice also prescribes a dedicated 20-amp electrical circuit for the home theater system. AV receivers, power amplifiers, and laser projectors draw significant instantaneous current during dynamic audio passages and startup cycles. When sharing a circuit with other household loads, the resulting voltage sag manifests as audible noise floor elevation and reduced amplifier headroom on peaks. A dedicated circuit — or two for large, amplifier-heavy systems — eliminates this noise contribution entirely. Every experienced installer also universally recommends labeling every cable run at both ends during the rough-in phase, before any walls are closed. A written cable schedule documenting run identity, gauge, connector type, and routing path eliminates hours of diagnostic work at every future upgrade or service event.
Running two conduit pathways where you think you need one adds minimal cost during rough-in and avoids the expense of retrofitting cable through finished walls later. Future-proof your infrastructure on day one.
What Tools and Resources Does a Home Theater Installation Require?
- Laser measure: Accurate room dimensioning for display sizing calculations and speaker placement geometry verification
- Stud finder and cable/pipe detector: Locating framing members and existing services before drilling into walls or ceilings
- Fish tape and extended drill bits: Routing cable through wall cavities and floor joist bays without opening drywall
- EMT conduit bender: Forming smooth bends in metal conduit to prevent cable jacket damage during pull-through
- Calibrated SPL meter or measurement microphone: Verifying speaker output levels and subwoofer placement quality before running room correction software
- HDMI 2.1 signal analyzer: Confirming full 48 Gbps signal integrity across all long cable runs before walls are closed
- Digital inclinometer: Verifying projector mounting angle, screen level, and speaker tilt angles to specification
- Banana plug crimping tool: Terminating all speaker wire with clean, low-resistance, oxidation-resistant connections
- Thermal transfer cable label system: Permanent, legible identification at both ends of every run, resistant to heat and moisture in equipment racks
What Are the 2026–2027 Trends Shaping Home Theater Installation?
Two converging developments are materially changing home theater installation practice as of 2026. The first is the mainstream viability of wireless rear and height channel speakers at reference audio quality. Earlier wireless surround implementations suffered from latency artifacts and audio compression that made them unsuitable for critical home theater use. New 2026 implementations using 60 GHz RF transmission achieve sub-millisecond latency with fully uncompressed PCM audio delivery — removing the primary technical objection to wireless placement and dramatically simplifying Dolby Atmos height channel installation in rooms where in-ceiling cable routing is structurally impractical. The second major development is AI-adaptive room correction: where first-generation systems applied static EQ curves derived from a single measurement session, leading 2026 implementations use machine learning models trained on thousands of room measurements to dynamically adjust filter parameters based on listening content type, occupancy changes, and real-time acoustic monitoring. Looking ahead to 2027, the migration of spatial audio object rendering to dedicated receiver-level DSP hardware promises further precision gains for immersive audio reproduction in residential environments, independent of the source stream’s processing quality.
What Is the Complete Step-by-Step Home Theater Installation Sequence?
The following ten-step sequence reflects current best practice for home theater installation in 2026, applicable to both professional-led and advanced DIY projects. Each step must be completed in order — later phases depend directly on the groundwork laid in earlier ones.
- Conduct a full site survey. Measure the room precisely — length, width, ceiling height, window and door positions, and all structural intrusions. Use a cable and pipe detector to identify hidden in-wall services before drilling. Document all findings on a scaled floor plan.
- Create a dimensioned room layout. Mark the screen wall center, primary listening seat, and all speaker positions on the scaled plan using ITU-R BS.775-3 placement geometry for your target channel configuration. Confirm that all viewing distances fall within the optimal range for your target screen size before proceeding.
- Plan cable pathways and install all conduit. Map every signal run — HDMI, speaker wire, subwoofer cable, power, and control lines — from the AV rack position to each termination point. Install all conduit with pull strings in place before any AV equipment arrives on site.
- Install acoustic treatment mounting hardware. Secure bass trap brackets in all room corners and first-reflection panel brackets on side walls and the ceiling above the primary seating row. Treating before component placement is significantly easier than retrofitting panels around installed equipment.
- Install display mounting hardware. Secure the projector mount, fixed-frame screen hardware, or flat-panel wall bracket with structural fasteners into studs or purpose-installed blocking. Level and align the mount precisely — angular misalignment in a projection system translates directly into keystone error and image distortion at the screen.
- Pull all cable runs through conduit. Route all cable types through their designated conduit paths. Label both ends of every run immediately with a durable identification system. Record every run in a written cable schedule: identity, gauge, connector type, routing path, and termination locations at both ends.
- Assemble the AV rack or equipment cabinet. Position all components with adequate vertical clearance for airflow. Connect all signal cables first, then speaker wire, then power cables. Dress and secure the cable harness with management sleeves or ties to maintain airflow around heat-generating devices.
- Install and wire all speakers. Mount each speaker at its calculated position and confirm placement angles with a digital inclinometer. Terminate all speaker wire with banana plugs or spade connectors for low-resistance, mechanically secure connections. Verify polarity consistency across all channels before powering on.
- Conduct a pre-calibration system verification. Power on the full system and confirm that every source passes a video signal to the display, all speaker channels produce audio output, and the AV receiver reports no configuration or connection errors. Diagnose and resolve all wiring faults before proceeding to calibration.
- Execute full audio and video calibration. Run the receiver’s room correction sequence from the primary position and all secondary seats. Follow up with manual level and delay verification, subwoofer phase alignment using a polarity test track, and full display calibration to the D65 6500K white point at the appropriate gamma target for your room’s controlled light level.
Frequently Asked Questions About Home Theater Installation
How long does a typical home theater installation take?
A complete dedicated home theater installation typically takes two to five days for a professional crew, depending on room size, in-wall cable routing complexity, and whether acoustic treatment is included in the scope. A DIY installation in a pre-wired space can be completed in a long weekend. Installing new conduit runs through finished walls adds one to two days and generally requires drywall patching and repainting before the room is presentable.
What is the minimum room size for a dedicated home theater?
The practical minimum for a dedicated home theater with full multichannel surround sound is approximately 10 feet wide by 13 feet long. A room of at least 12 by 16 feet is recommended for proper ITU-standard surround speaker placement, adequate bass development for the subwoofer, and comfortable viewing distances for screen sizes of 100 inches or more. Smaller rooms can support excellent 5.1 configurations but physically constrain the placement of surround and height channels below their reference angles.
Do I need to hire a professional for my home theater installation?
Many elements of home theater installation are achievable for skilled DIY homeowners: display mounting, component connection, running cable through pre-existing conduit, and operating room correction software. However, new in-wall conduit installation in finished spaces, dedicated electrical circuit work, structural projector mounting at height, and ISF professional video calibration all deliver measurably better outcomes with specialist expertise. The practical approach is to DIY the elements you have direct competence in and hire professionals for the electrical, structural, and precision calibration phases.
How much does acoustic treatment cost for a home theater?
Acoustic treatment for a typical 12 × 16 foot home theater room costs between $400 and $2,500 depending on treatment density and product selection. A basic treatment package — four corner bass traps, four first-reflection broadband panels, and a rear-wall diffuser — can be assembled for under $800 using quality commercial acoustic products. A comprehensive build-out with custom-sized fabric-wrapped panels, a ceiling cloud, and a full diffuser array runs $1,500 to $3,000. Per dollar of audible improvement delivered, acoustic treatment consistently outperforms equivalent investment in source component or amplification upgrades.
Should I use a projector or a flat-panel TV for my home theater?
In a fully light-controlled dedicated room, a front-projection system with a quality 4K laser projector delivers more screen real estate per dollar than any flat-panel alternative at an equivalent investment level. A projector and fixed-frame screen in the $2,500 to $5,000 combined range produces a 120-inch image that no flat-panel display at a comparable price can match in physical scale. In rooms with ambient light that cannot be fully controlled, an 85-inch or larger OLED or QLED flat panel outperforms projection in contrast ratio, black level performance, and peak brightness. Room light control capability should be the primary deciding factor in every display technology decision.
What crossover frequency should I use for home theater speakers?
The Dolby and THX reference crossover frequency for home theater is 80 Hz, applied to all speakers configured as “small” in the AV receiver’s speaker setup menu. This routes all bass below 80 Hz to the subwoofer, which handles low-frequency reproduction more effectively than most main speakers in a room-loaded system. Large floor-standing speakers with verified flat bass extension below 60 Hz can use a lower crossover point, but 80 Hz is the technically correct default and the optimal setting for the vast majority of home theater speaker systems.
How do I verify that my home theater calibration is correct?
After running room correction, verify calibration quality by measuring frequency response at the primary listening position using a measurement microphone and analysis software such as REW (Room EQ Wizard). A well-calibrated system should achieve frequency response within ±3 dB from 40 Hz to 16 kHz at the primary seat, with bass response variation between primary and secondary seats below 6 dB. Perceptually, dialogue should be clearly intelligible at moderate listening levels, spatial effects should localize precisely to their intended positions, and music playback should reproduce instruments in stable, correctly located stereo image positions.
Conclusion: Your Home Theater Installation Roadmap for 2026
A high-performance home theater installation is achievable for any homeowner who approaches the project with the right sequence and the right priorities. Technical quality is determined more by planning discipline than by component cost. A correctly planned room, a properly positioned speaker array, a well-routed cable infrastructure, and a calibrated system will outperform a more expensive but poorly installed alternative every time — by a significant and measurable margin.
Your 2026 implementation timeline: begin with a full room survey and acoustic assessment before purchasing any equipment. Define the screen wall, primary seating position, and speaker layout on a scaled plan, and confirm all viewing geometry calculations before committing to a display size. Rough in all conduit before any mounting work begins. Install acoustic treatment brackets before placing any AV components. Mount and wire systematically, label every cable run at both ends, and perform complete audio and video calibration before declaring the project finished. This ten-step process, followed in documented order, produces a home theater that operates at the ceiling of its components’ capability — and that remains technically upgradeable as 8K content delivery, wireless reference-quality surround, and AI-adaptive calibration systems continue to mature through 2027 and beyond.