Setting up a home theater system means selecting the right components, treating your room acoustically, placing speakers with precision, and calibrating everything to measurable standards. Those four steps — executed in sequence — consistently deliver cinema-quality results. This complete technical guide covers every stage of home theater setup, from room assessment to final system calibration. Falling display prices and the mainstream arrival of Dolby Atmos hardware at accessible price points continue to drive home theater installation growth.
Executive Summary
- Component choice sets the performance ceiling. An AV receiver, a speaker system, a 4K display, acoustic treatment materials, and HDMI 2.1 cabling all contribute to overall system output — a weakness in any single category limits every other component connected to it.
- Placement consistently outweighs equipment cost. Correct speaker geometry per ITU-R BS.775 consistently improves stereo imaging compared to furniture-driven layouts, at zero additional cost.
- Automated calibration closes the acoustic gap. Room correction tools such as Audyssey MultEQ XT32 and Dirac Live substantially reduce in-room frequency response variation across the full audible range.
- 2026 marks a genuine value inflection point. 4K OLED panel prices have fallen substantially, and entry-level Dolby Atmos receivers have crossed the $300 threshold — making reference-class home theater accessible to a broader range of households than at any prior point.
What Equipment Do You Need for a Home Theater System Setup?
A complete home theater system relies on five core hardware categories: a display, an AV receiver, a speaker system, source devices, and cabling infrastructure. A sixth category — acoustic treatment — is not electronic hardware but delivers more measurable impact on audio performance than many component upgrades. Understanding each category before purchasing prevents the most expensive and common mistake: building a system around a bottleneck component that limits every other element in the chain.
Display technology divides into flat-panel (OLED, QLED, Mini-LED) and projection (short-throw and ultra-short-throw laser). Flat panels perform well in mixed-light environments; projectors suit purpose-built, light-controlled rooms where screen sizes above 100 inches are the objective. The AV receiver functions as the system’s central hub — decoding Dolby Atmos and DTS:X audio, amplifying multiple speaker channels simultaneously, and routing video between all source devices and the display. Speaker configurations follow a three-number naming convention: a 7.1.4 system means seven main channels, one subwoofer channel, and four overhead Atmos channels.
Source devices — 4K Blu-ray players, streaming media sticks, and gaming consoles — each place different bandwidth demands on your HDMI infrastructure. HDMI 2.1 cables and ports support up to 48 Gbps, enabling uncompressed 4K/120Hz and 8K/30Hz signals. Specifying HDMI 2.1 across every connection in the chain is the correct future-proofing strategy for a system built in 2026. Cabling is among the least expensive line items in a home theater budget and among the most consequential — the wrong cable type creates a hard ceiling on every format the system can pass.
How Do You Choose the Right Room for Your Home Theater?
Room selection is the most consequential decision in home theater design because the room itself functions as an acoustic instrument. Its dimensions, surface materials, and geometry determine bass response behavior, reverberation time, and early reflection patterns — acoustic phenomena that no downstream equalization can fully compensate. Rectangular rooms are preferable to square rooms. Square rooms generate powerful standing wave patterns at predictable frequencies, causing bass buildup and cancellation that varies dramatically by seating position.
Optimal viewing distance for 4K content follows a well-established formula: seat between 1.0 and 1.5 times the screen’s diagonal measurement from the display surface. A 75-inch 4K panel is correctly viewed from approximately 6 to 9 feet. Rooms with hard, parallel surfaces — bare concrete, large uncovered glass windows, uncarpeted timber floors — generate significant flutter echo and specular reflections. Carpeted floors, upholstered seating, and soft furnishings provide passive acoustic damping that reduces these problems before any dedicated treatment panels are installed.
Light control determines whether projection is viable in a given room. Even a modest amount of ambient light — a gap under a door, light bleed from an adjacent hallway — sharply degrades projected image contrast and apparent black level. Rooms capable of full blackout via blackout blinds or solid window coverings are optimal for any projector installation. For flat-panel displays, light control improves perceived contrast ratio but does not restrict system function the way it limits projection-based installations.
How Should You Position Your Speakers for Optimal Sound?
Speaker placement is the single highest-impact variable in home theater audio performance, and it costs nothing to get right. The ITU-R BS.775 standard provides a reference placement geometry developed through psychoacoustic research: left and right main speakers at ±30° from center, the center channel aligned with the display axis, and rear surround speakers positioned at ±100° to ±120°. This geometry ensures that spatial audio objects encoded in Dolby Atmos and DTS:X content reproduce with the directionality and envelopment the mix engineer intended at the reference monitoring position.
Subwoofer placement requires a separate approach because frequencies below 80Hz are largely omnidirectional and interact strongly with room boundaries. The most reliable method is the subwoofer crawl: temporarily place the subwoofer at the primary listening position and play a continuous low-frequency sweep while walking the room perimeter. The position where the bass sounds clearest and most extended — typically a front corner adjacent to the main speakers — becomes the subwoofer’s permanent location. This technique consistently identifies positions that exploit room boundary reinforcement without introducing excessive one-note resonance.
Overhead Atmos channels require either ceiling-mounted discrete speakers or upward-firing speaker modules placed on top of the front main speakers. Dolby’s official specification places overhead front speakers at 30° elevation from the listening position and overhead rear speakers at 55°. Ceiling-mounted speakers must be angled toward the primary listening position using adjustable baffles. Ceiling height significantly affects perceived immersion — rooms with ceilings below 8 feet compress the vertical sound field and reduce the effectiveness of height-encoded audio objects in Atmos content.
Which AV Receiver Should You Choose in 2026?
The AV receiver is the central processing and amplification hub of the entire home theater system. In 2026, receiver selection centers on four technical specifications: channel processing count, continuous power output per channel, room correction platform, and HDMI 2.1 input count. Channel count determines the maximum speaker configuration the receiver supports — a 9.2.4-capable receiver powers nine main channels, two independent subwoofers, and four overhead Atmos channels simultaneously. Power output, rated in watts per channel (WPC) at a stated impedance and distortion level, must comfortably exceed the sensitivity requirements of your chosen speakers under realistic dynamic conditions.
Room correction technology has become the decisive differentiator at the mid-range price point. Audyssey MultEQ XT32, licensed by Denon and Marantz, uses a multi-position measurement process and a high-resolution filter bank to generate per-channel correction curves. Dirac Live, available as an add-on license for receivers from several manufacturers, implements minimum-phase digital filters with a particularly effective approach to low-frequency correction. Yamaha’s YPAO Precision uses reflected sound analysis to adjust for early-reflection problems that standard measurement-and-correct systems miss. Each platform involves real trade-offs in implementation quality, low-frequency resolution, and user interface depth.
HDMI 2.1 input count is a practical purchasing constraint that is easy to underestimate. A system combining a 4K Blu-ray player, a gaming console, and a streaming device requires at minimum three HDMI 2.1 inputs. eARC (enhanced Audio Return Channel) support on the display output enables lossless Dolby TrueHD and DTS-HD Master Audio transmission back from the TV’s smart app layer through the receiver — eliminating the need for a separate optical connection and preserving audio quality that standard ARC compresses. Any receiver purchased in 2026 for a new build should specify eARC on its display output as a baseline requirement.
How Do You Select and Calibrate Your Display?
Display selection depends on four interacting variables: ambient light levels, desired screen size, viewing distance, and total system budget. In 2026, four primary display technologies serve the home theater market, each with measurable strengths in contrast performance, peak brightness, color volume, and uniformity. OLED panels achieve perfect per-pixel black levels by switching individual pixels off entirely. Mini-LED panels use densely packed LED dimming zones to deliver peak brightness values several times higher than OLED — a meaningful advantage for HDR content with specular highlights. Laser projectors remain the only viable path to screen sizes above 120 inches at mainstream budgets.
| Technology | Typical Peak Brightness | Black Level | Best Use Case | 2026 Price Range (65″) |
|---|---|---|---|---|
| OLED | 800–1,500 nits | Infinite (per-pixel off) | Darkened rooms, critical viewing | $1,200–$2,500 |
| QLED | 1,000–2,500 nits | Very good (local dimming) | Bright living rooms, sport content | $900–$2,000 |
| Mini-LED | 1,500–4,000 nits | Excellent (FALD) | High-brightness HDR, well-lit rooms | $1,100–$3,500 |
| Laser Projector | 2,000–6,000 lumens ANSI | Screen-gain dependent | 100″+ screens in controlled light | $1,500–$8,000+ |
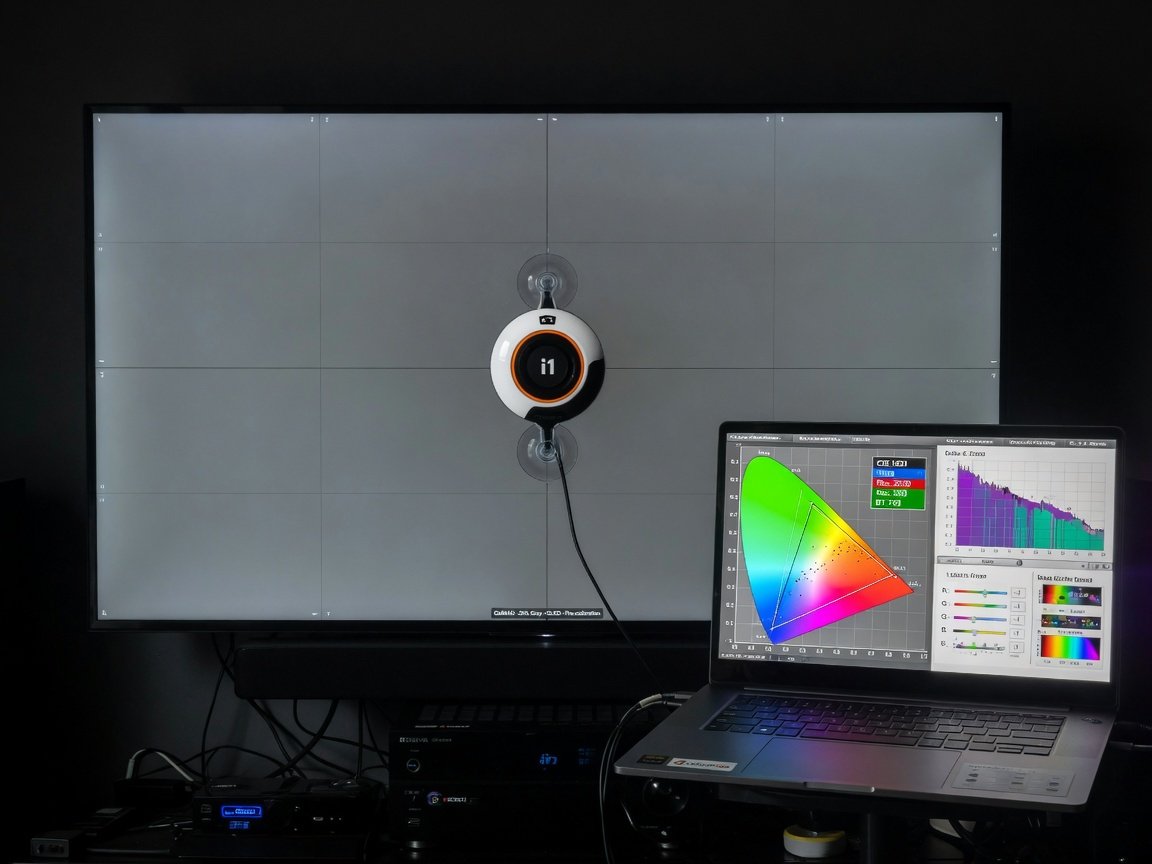
Display calibration is a distinct and critical step that occurs after physical installation. Factory default picture modes — typically labelled “Vivid,” “Dynamic,” or “Sports” — are tuned for showroom floor visibility, not accuracy. They boost backlight to maximum, oversaturate primary colors, and apply aggressive sharpening that creates artificial edge enhancement artifacts. A calibration targeting D65 white point and the BT.2020 (HDR) or BT.709 (SDR) color gamut using a colorimeter and dedicated software reduces average Delta-E color error values from above 6.0 — perceptibly inaccurate — to below 2.0, the threshold imperceptible to most human observers.
What Acoustic Treatment Options Work Best for Home Theaters?
Acoustic treatment addresses the room’s physical interaction with sound waves before they reach the listener. Without intervention, a typical rectangular room adds its own spectral signature: early reflections that blur stereo imaging and dialog intelligibility, flutter echo that obscures fine musical detail, and room modes that dramatically exaggerate or cancel specific bass frequencies depending on listening position. Equalization in the signal chain compensates partially for these effects, but it cannot undo the physical addition of reflected energy — treatment at the source is the technically correct and more effective approach.
Acoustic treatment divides into three functional categories. Broadband absorbers — mineral wool or open-cell foam panels 2–4 inches thick — target mid and high-frequency reflections at first-reflection points on side walls and the ceiling directly above the primary listening position. Bass traps, typically triangular or cylindrical corner-mounted absorbers filled with dense mineral wool, target low-frequency energy at room corners where standing waves concentrate. Correctly positioned bass traps substantially reduce room resonance at problem frequencies, producing a meaningful improvement in low-frequency clarity. Diffuser panels scatter mid-frequency sound waves rather than absorbing them, maintaining spaciousness while eliminating problematic specular reflections from rear walls.
The minimum effective treatment configuration for a home theater consists of corner bass traps at all four floor-to-ceiling front corners, broadband absorbers at both side-wall first-reflection points, and a ceiling cloud panel centered above the listening position. This arrangement typically reduces the room’s reverberation time (RT60) from an untreated 0.5–0.8 seconds to the 0.3–0.4 second range that acoustic engineers identify as optimal for home theater listening.
How Do You Connect and Wire All Home Theater Components?
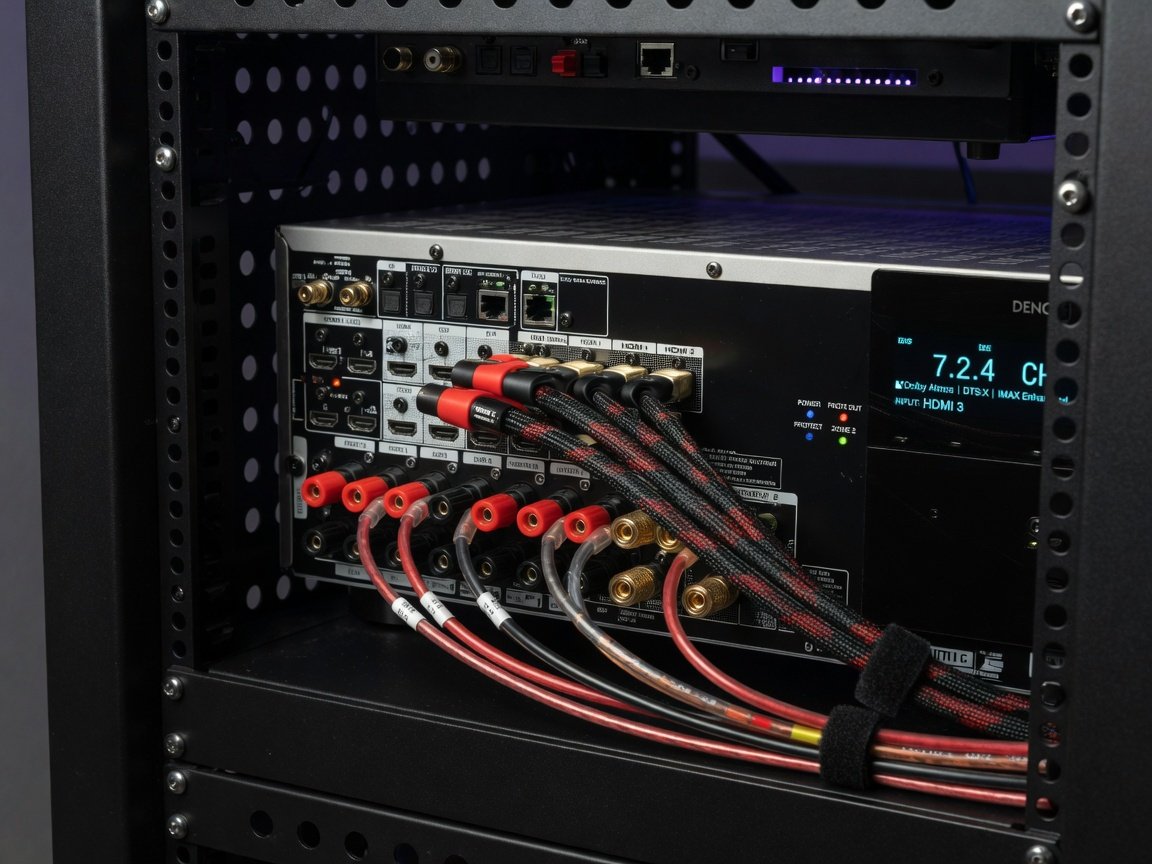
Structured cable planning begins before any component is physically placed. Map every cable run — HDMI from sources to receiver, HDMI from receiver to display, speaker wire from receiver terminals to each speaker, RCA or XLR from receiver to subwoofer, and AC power to each component — on a scaled room diagram before routing a single cable. This prevents the common and time-consuming problem of discovering mid-installation that a critical run crosses a doorway, requires disassembling a completed sub-assembly, or cannot reach its destination without additional cable length.
Speaker wire gauge selection follows a straightforward rule: use 16 AWG for runs up to 50 feet, 14 AWG for runs up to 100 feet, and 12 AWG for longer runs. Lower gauge numbers indicate thicker conductors with lower DC resistance — important for preserving amplifier damping factor and maintaining high-frequency response over long cable runs to rear and overhead Atmos speakers. In-wall speaker wiring for overhead channels requires cable rated for in-wall installation — typically CL2 or CL3 in North American building codes — not standard bulk speaker wire. Confirm local building code requirements before routing any in-wall cable.
Power conditioning is an underspecified element in most consumer home theater installations. A dedicated electrical circuit for the AV receiver and display, isolated from appliances with electric motors on the same breaker, reduces injected electrical noise at the component power supply level. A quality power conditioner with line-level noise filtration and transient surge suppression provides an additional layer of isolation, protecting expensive electronics and potentially improving audible noise floor in high-gain listening conditions. This is not an audiophile abstraction — motors on shared circuits inject measurable interference into AC supply lines.
How Do You Calibrate Your Home Theater System After Setup?
System calibration translates correct hardware choices and placement into verifiable, measurable performance. A disciplined calibration sequence prevents the most common error: calibrating display settings before correcting acoustic problems, or running room correction before verifying that speaker polarity, distances, and crossover frequencies are correctly configured. Each calibration step builds on the last. Performing them out of order produces a system that measures incorrectly and sounds worse than one calibrated from scratch in the correct sequence.
What Is the Real-World Cost of a Home Theater Setup in 2026?
Home theater system costs span a wide range across component tier, room size, and whether professional installation services are included. Three practical budget tiers represent the realistic 2026 market landscape for new builds:
| Tier | Configuration | Estimated Total Cost | Primary Constraint |
|---|---|---|---|
| Entry | 5.1.2 Atmos, 55″ OLED, AVR with MultEQ | $1,800–$2,800 | Speaker sensitivity limits dynamic range at high SPL |
| Mid-Range | 7.1.4 Atmos, 65″ OLED, AVR with Dirac Live | $4,000–$7,500 | Acoustic treatment often basic or omitted |
| Reference | 9.2.4 Atmos, 77″+ OLED or laser projector, full treatment | $12,000–$30,000+ | Diminishing perceptual returns above this threshold |
Acoustic treatment adds $200–$1,500 depending on room size and panel specification. Professional calibration services for a residential installation range from $300 to $800. In-wall wiring and ceiling speaker installation labor adds $500–$2,000 depending on structural access complexity. Cabling, power conditioning, and rack furniture typically contribute $300–$600 to the project total. Native 8K content availability is currently insufficient to justify the price premium of 8K displays for the vast majority of home theater use cases.
What Common Mistakes Should You Avoid When Setting Up a Home Theater?
The most consequential setup errors share a common characteristic: they are difficult to detect without measurement tools and produce problems that worsen or compound over time. Most require partial disassembly to correct after the fact.
- Placing speakers to fit furniture rather than following reference geometry. This is the primary cause of narrow soundstage, poor imaging, and incoherent surround sound. Furniture should accommodate the speaker layout — not the reverse.
- Setting the subwoofer crossover frequency below the main speakers’ capabilities. Most bookshelf and satellite speakers require a crossover between 80Hz and 120Hz. Setting the crossover below 60Hz forces these drivers to reproduce frequencies outside their linear excursion range, generating audible distortion and consuming amplifier headroom.
- Skipping display calibration after installation. Factory “Vivid” or “Standard” picture modes introduce measurable color errors and incorrect gamma tracking. These settings cause visible eye fatigue on extended viewing and distort the color accuracy of every HDR source the display processes.
- Running automated room correction in a room with background noise. HVAC systems, refrigerators, and external traffic contaminate microphone measurement signals. The resulting EQ curves compensate for noise artifacts rather than acoustic room problems, degrading rather than improving the frequency response at the listening position.
- Using undersized cable for long speaker runs. High-resistance wiring on long rear surround or Atmos ceiling speaker runs introduces frequency response anomalies and reduces amplifier damping factor, affecting bass transient response and overall system control.
- Treating acoustic treatment as optional. No level of expensive hardware compensates for an untreated room’s acoustic signature. Bass modes and first-reflection problems are always audible in the listening experience — they simply become more audible as the quality of the electronics improves.
What Do Home Theater Experts Recommend for 2026 System Builds?
A consistent theme in home theater best practices is the primacy of the room and the systematic underestimation of acoustic treatment by consumer-level buyers. The technical consensus on format baseline has shifted decisively: Dolby Atmos is now the minimum expected audio format for any home theater system commissioned in 2026.
The practical recommendation from AV systems professionals for receiver selection in 2026 is to purchase a unit that supports at minimum 7.2.4 channel processing, even when initially populating only 5.1 channels. The incremental cost between a 5.1-capable and 7.2.4-capable receiver at the mid-range price point is typically $100–$200 — a modest premium for the flexibility to expand without replacing the system’s central component. Streaming content now drives the majority of home theater usage, with physical 4K Blu-ray favored primarily among videophiles seeking lossless Dolby TrueHD and DTS-HD Master Audio audio quality unavailable through compressed streaming delivery.
What Home Theater Trends Should You Plan For in 2026–2027?
Several technology developments are actively reshaping home theater system design in the second half of 2026 and throughout 2027. Awareness of these trends informs purchasing decisions — particularly around connectivity future-proofing, audio format support, and display technology selection in a product landscape that is evolving more quickly than at any prior point in the category’s history.
- HDMI 2.2 adoption beginning: HDMI 2.2, supporting up to 96 Gbps bandwidth, is appearing in high-end displays and flagship receivers entering the market in late 2026. While 8K residential adoption remains minimal, HDMI 2.2 enables uncompressed 8K/60Hz and 4K/240Hz — relevant for next-generation gaming monitors and cinema-grade mastering displays entering the consumer market.
- AI-driven adaptive room correction: Multiple manufacturers demonstrated real-time, AI-based room correction at CES 2026 that continuously adapts EQ curves based on live listening position tracking. These systems adjust the acoustic correction profile as occupants move throughout the room, moving beyond the fixed single-seat optimization of current automated EQ implementations.
- WiSA wireless speaker technology maturing: WiSA (Wireless Speaker and Audio) has improved end-to-end latency to below 2ms in 2026-generation implementations — approaching wired performance for surround and overhead Atmos channels in installations where in-wall cable routing is architecturally impractical.
- Consumer Micro-LED approaching price accessibility: Micro-LED panels above 100 inches are expected to enter the sub-$10,000 price range by mid-2027, combining OLED-level per-pixel contrast with Mini-LED-class peak brightness. This convergence may fundamentally alter the projection-versus-flat-panel decision for large-format home theater builds.
- Dolby Atmos Flex Connect interoperability: The 2026 Flex Connect standard enables compatible soundbars and discrete satellite speakers to function within a single unified Dolby Atmos system, allowing gradual expansion from a soundbar base configuration to a fully discrete speaker layout without replacing the entire system.
Frequently Asked Questions About Home Theater System Setup
How long does a home theater system setup take?
A basic 5.1 system installation — unpacking, positioning, wiring, and running automated calibration — takes approximately 4–6 hours for an organized first-time installer working with pre-purchased components. A 7.2.4 Dolby Atmos system with ceiling speaker installation and in-wall wiring typically requires 8–16 hours across a full weekend, including time for acoustic measurement documentation. Allow additional time for display wall mounting and cable management if those elements are part of the build.
Do I need a dedicated room for a home theater?
No. A dedicated room delivers the highest acoustic performance because it allows full control over treatment and speaker placement. However, excellent results are achievable in a multipurpose living room with careful planning. The critical constraint is symmetry: the primary listening position must be equidistant from the left and right main speakers. An off-axis listening position degrades stereo imaging and Atmos height channel localization regardless of how expensive the system is.
What is the correct subwoofer crossover frequency?
For most bookshelf and satellite speaker systems, the correct LFE crossover frequency is 80Hz — the value specified in the THX certification standard and recommended by Dolby’s reference calibration guidelines. Tower speakers with measured bass extension below 40Hz can be crossed over lower, typically at 60Hz. Setting the crossover above 120Hz introduces localization cues that make the subwoofer position perceptibly audible, breaking the seamless blend between main speakers and bass channel.
Is Dolby Atmos worth the investment in 2026?
Yes — with a practical qualification. Dolby Atmos adds genuine, measurable spatial depth and height information to compatible content, making film scores and action sequences noticeably more enveloping. The improvement depends on correct overhead speaker placement and adequate ceiling height. Rooms with ceilings below 8 feet compress the vertical sound field. In 2026, the entry cost for Atmos-capable hardware is approximately $400–$700 above a standard 5.1 budget — a modest premium for a format with a large and growing content library across streaming and physical media.
Is display calibration more impactful than buying a higher-tier display?
Frequently, yes. A well-calibrated mid-range OLED panel consistently delivers more accurate color reproduction and correct gamma tracking than an uncalibrated premium panel from the tier above it. Factory default settings on most displays produce average Delta-E color error values above 6.0 — perceptibly inaccurate on skin tones, shadow gradations, and saturated highlights. Professional ISF calibration, or competent consumer-level calibration using a colorimeter and dedicated software, brings average Delta-E below 2.0, the threshold at which color error becomes imperceptible to the human visual system.
What is the minimum room size for a home theater?
The practical minimum for a functional 5.1 home theater is approximately 10 feet × 13 feet (130 square feet). This allows for a 75-inch display at a proper 4K viewing distance and enough lateral space for correct ITU-R BS.775 left-right speaker placement geometry. Smaller rooms produce more severe bass mode problems and force compromises in speaker placement that measurably reduce performance. Rooms below this threshold typically benefit more from a high-quality 2.1 nearfield configuration than from a full multichannel system operating under physical constraints.
Getting Started: Your Home Theater Setup Timeline
A successful home theater system setup follows a clear sequential process. Compressing or skipping stages — particularly room planning, speaker placement, and calibration — reliably produces systems that underperform their hardware’s measured capability. The following six-week implementation sequence represents the technically correct order of operations for a new build in 2026.
- Week 1 — Room Assessment and Planning: Measure room dimensions, evaluate surface materials and light control, and draw a speaker placement diagram based on ITU-R BS.775 geometry. Identify acoustic treatment requirements before purchasing any hardware. This planning step prevents costly component choices made without knowledge of the room’s constraints.
- Week 2 — Component Procurement: Purchase in this priority order: AV receiver → speakers and subwoofer → display → cables and accessories → acoustic treatment materials. Ordering acoustic treatment at this stage ensures it arrives before installation day.
- Week 3 — Physical Installation: Run all cable infrastructure before placing any components. Mount or position speakers, subwoofer, and display. Connect all components and verify speaker polarity at every terminal before applying power.
- Week 4 — Initial Calibration: Run the receiver’s automated room correction in a silent room. Verify trim levels with an SPL meter. Calibrate the display using a colorimeter. Document baseline frequency response measurements using REW.
- Week 5 — Acoustic Treatment Installation: Install corner bass traps, side-wall first-reflection absorbers, and a ceiling cloud panel. Re-run room correction after treatment installation and compare post-treatment REW measurements against the baseline to quantify the acoustic improvement.
- Week 6 — Fine-Tuning and Documentation: Apply manual parametric EQ corrections for any remaining response anomalies. Optimize HDR tone mapping settings for your display’s peak brightness capability. Confirm that every source device is transmitting correct audio and video formats through the chain. Photograph and document final cable routing for future reference.
Following this sequence consistently produces home theater systems that measure accurately and perform to the full capability of their hardware. hometheaterinfoline.com publishes component-specific calibration guides, room acoustic calculators, and speaker placement tools that support each stage of this process for every system tier and room size.
— **Schema Markup (reference):** Embedded above as a “ block containing Article, HowTo, and FAQPage schema in JSON-LD format, targeting `https://hometheaterinfoline.com/home-theater-system-setup/`.